grandMA3 User Manual Publication
Connect External Screens
|
grandMA3 User Manual » First Steps » Connect External Screens
|
Version 2.2
|
You can connect up to five external touch screens with a grandMA3 full-size CRV (= Control Room Version). For more information about the amount of DisplayPort connectors of each model, see Quick Manual Consoles - Technical Data.

|
Important: |
| The grandMA3 series supports only native DisplayPort connectors on external screens. |
|
|
Important: |
| In grandMA3 CRV versions, use at least one Full HD display and a touch display or a mouse. |

|
Hint: |
| The grandMA3 compact and the compact XT models only have one DisplayPort called DP1. |
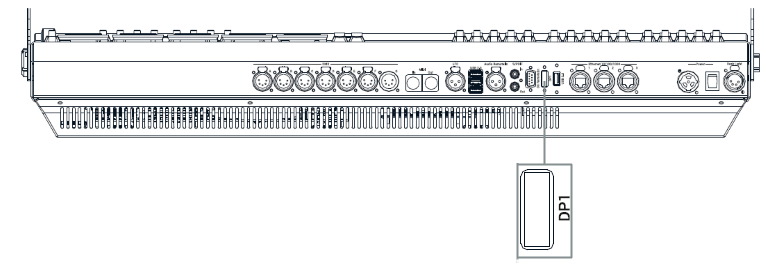
Screen Arrangement
Place the screens in the following order:
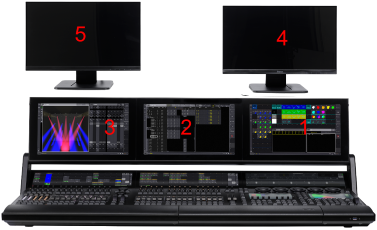
- Screens 5 and 4 are always external screens.
- Screens 3, 2, and 1 can be internal or external screens, depending on the product.
- The screen order is important for the mouse behavior from screen to screen.
Requirements for external monitors:
- Native DisplayPort connection
- Resolution of 1920 x 1080 (full HD)
- Microsoft Windows® 10 multi-touch compliance
- Separated USB connection for touch functionality
Connect external touch screens:
- Make sure the console is turned off.
- Place the first external screen right beside or above screen 1 and the second external screen left beside or above screen 3.
The screen numbers of the external screens will be numbered consecutively. - Connect the DisplayPort cable of screen 4 with the DisplayPort connector DP4.
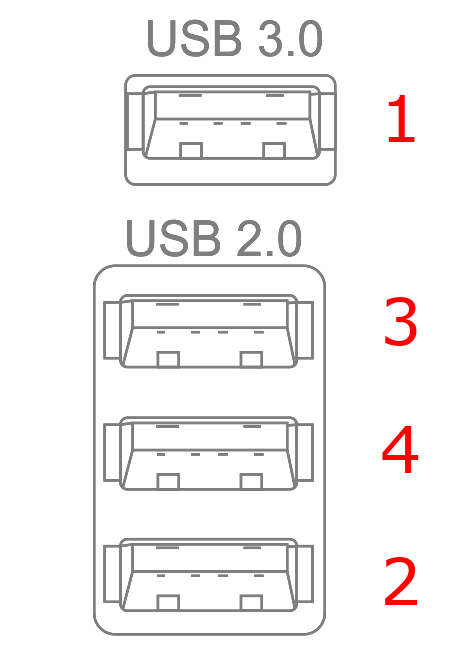
- Connect the USB cable with the corresponding USB port.
- Connect the DisplayPort cable of screen 5 with the DisplayPort connector DP5.
- Connect the touch screen USB cable to the appropriate USB port in the correct order as shown below:
- Press Power to boot up the console.
Touch Configuration
-
To adjust the touch configuration, tap
 , Settings and then tap Touch Configuration. The Touch Configuration overlay opens:
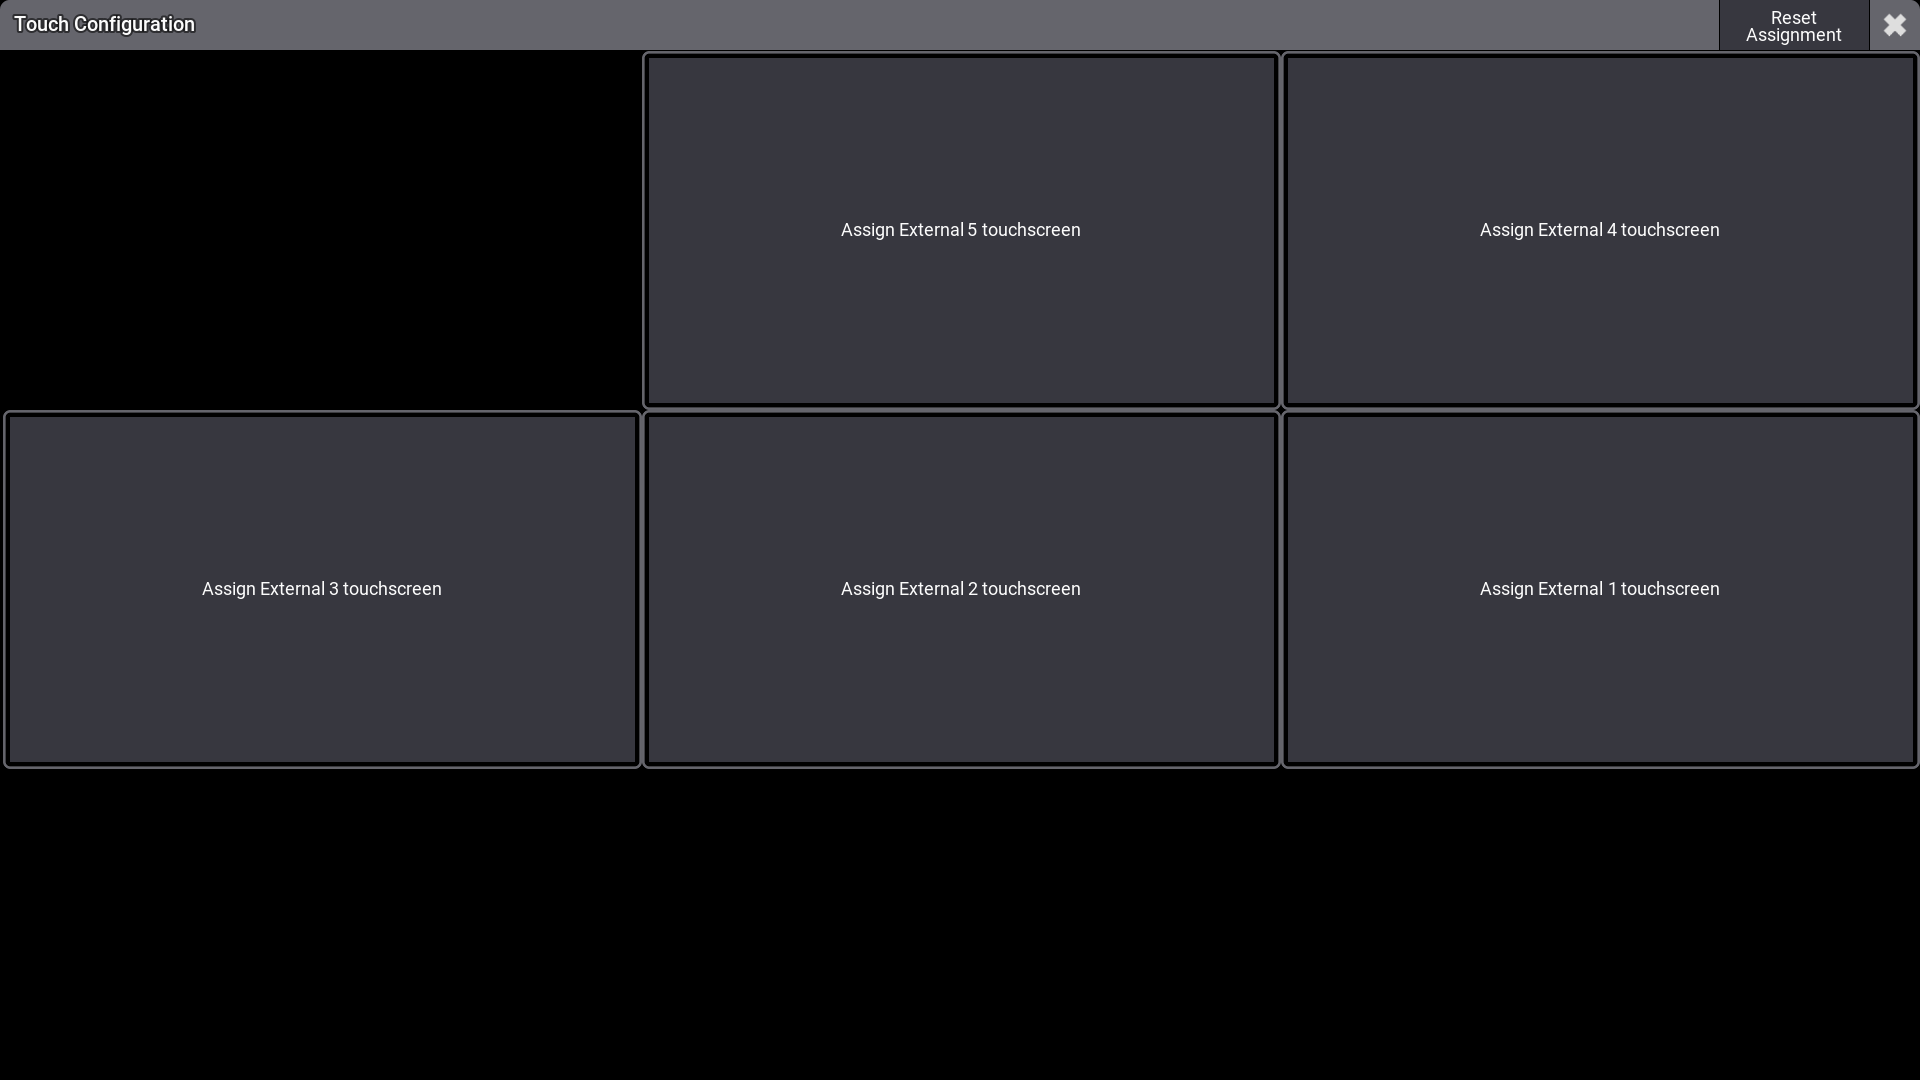
- To assign a touch input to a monitor, tap a monitor button in the touch configuration overlay. For example, Assign External 1 touchscreen.
- Touch the appropriate monitor screen to assign the touch input to that device. An overlay appears on the currently selected screen:

- The touch function is assigned to the monitor.
- Reset Assignment: Resets the screen allocation.
|
|
Hint: |
| grandMA3 onPC settings do not have a Touch Configuration button, as they are handled by the operating system. |
USB Configuration
- To check the USB settings, tap , Settings and then tap USB configuration. The USB Configuration overlay opens:
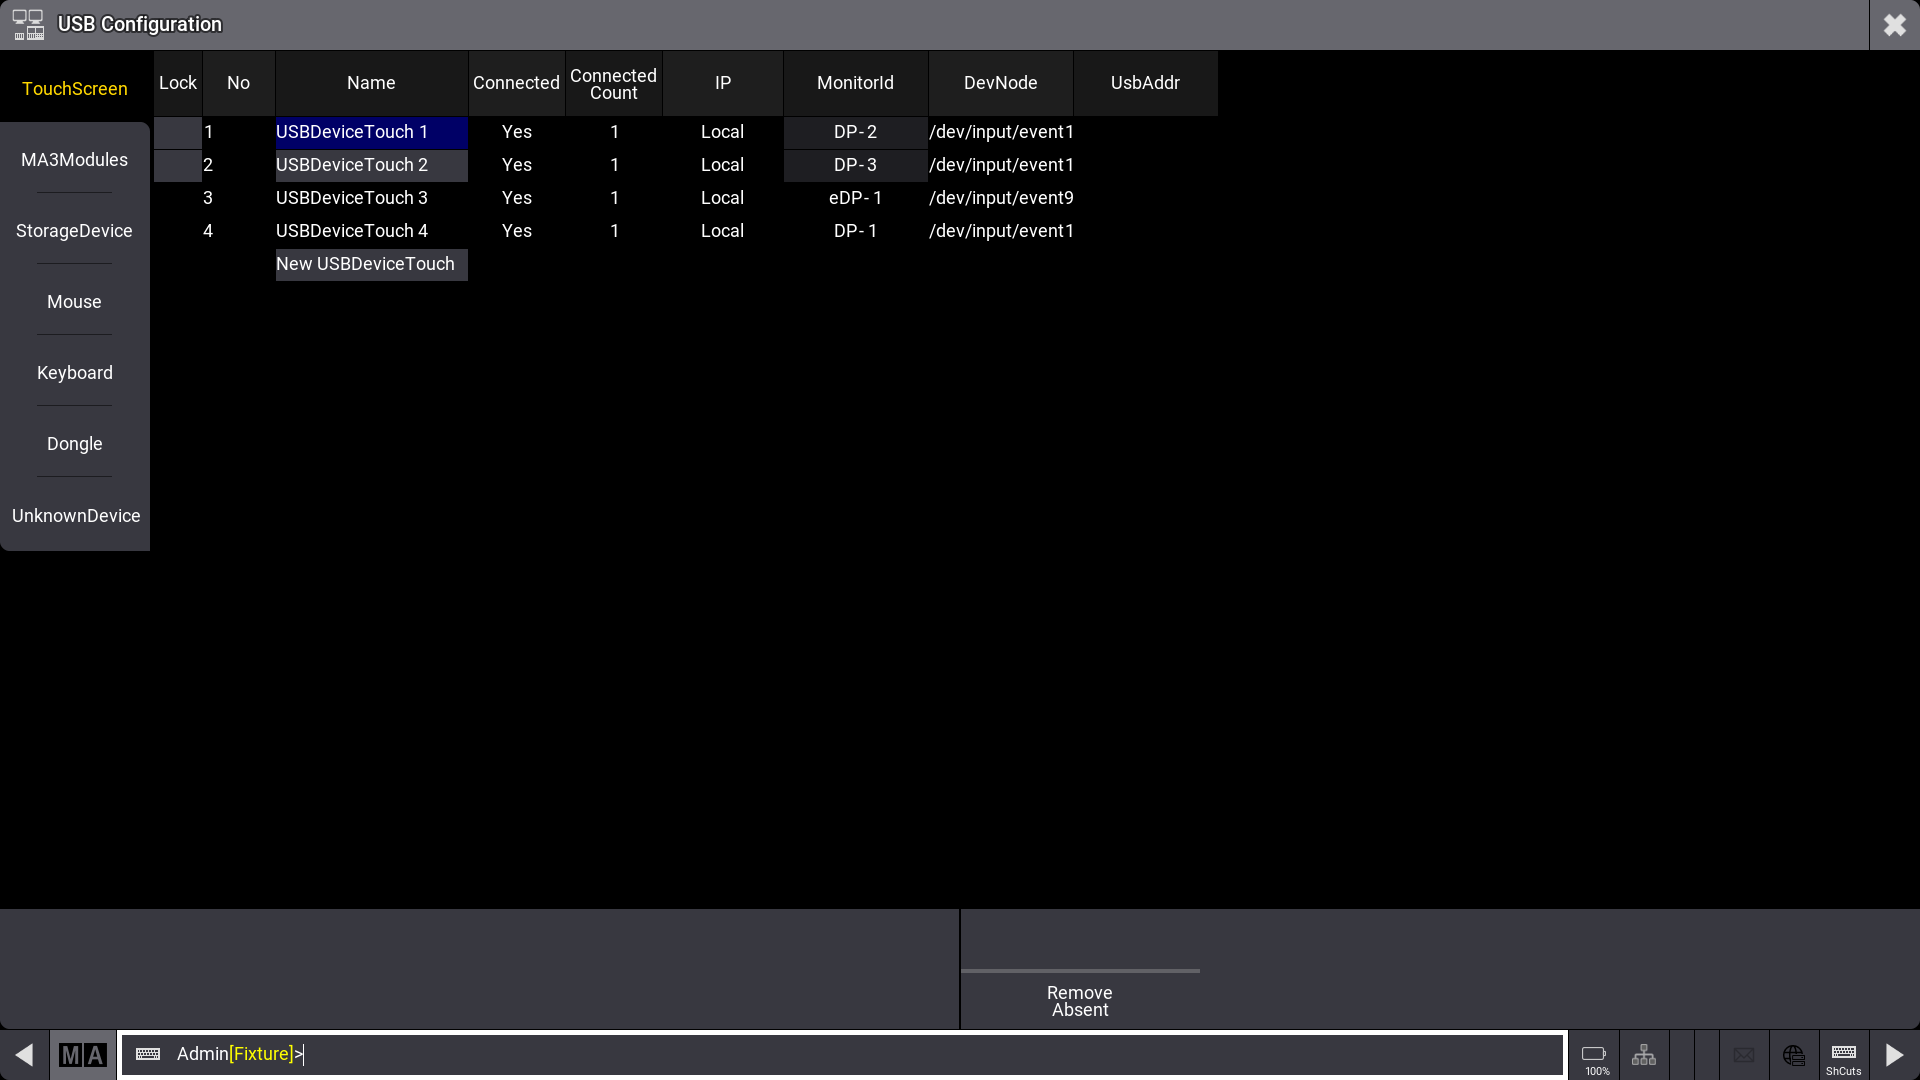
- Remove Absent: Removes disconnected monitors from the list above.