grandMA3 User Manual Publication
Record an External Timecode Show
|
grandMA3 User Manual » Timecode » Record an External Timecode Show
|
Version 2.1
|
The grandMA3 can receive 3 types of external timecode signals: SMPTE, MIDI (MTC), or Art-Net Timecode (ArtTimeCode).
Requirements:
- Patch fixtures
- Store values in cues and create a sequence. For more information, see Patch and Fixture Setup and Cues and Sequences.
- A visible timecode window and timecode pool. For more information, see Add Windows.
Here are the steps to record a timecode show from an externally generated source.
SMPTE:
- Connect the external SMPTE source to the LTC XLR connector at the back of the console. For more information, see Device overview.
- Press Menu, then tap Connector Configuration. This will open the Output Configuration menu.
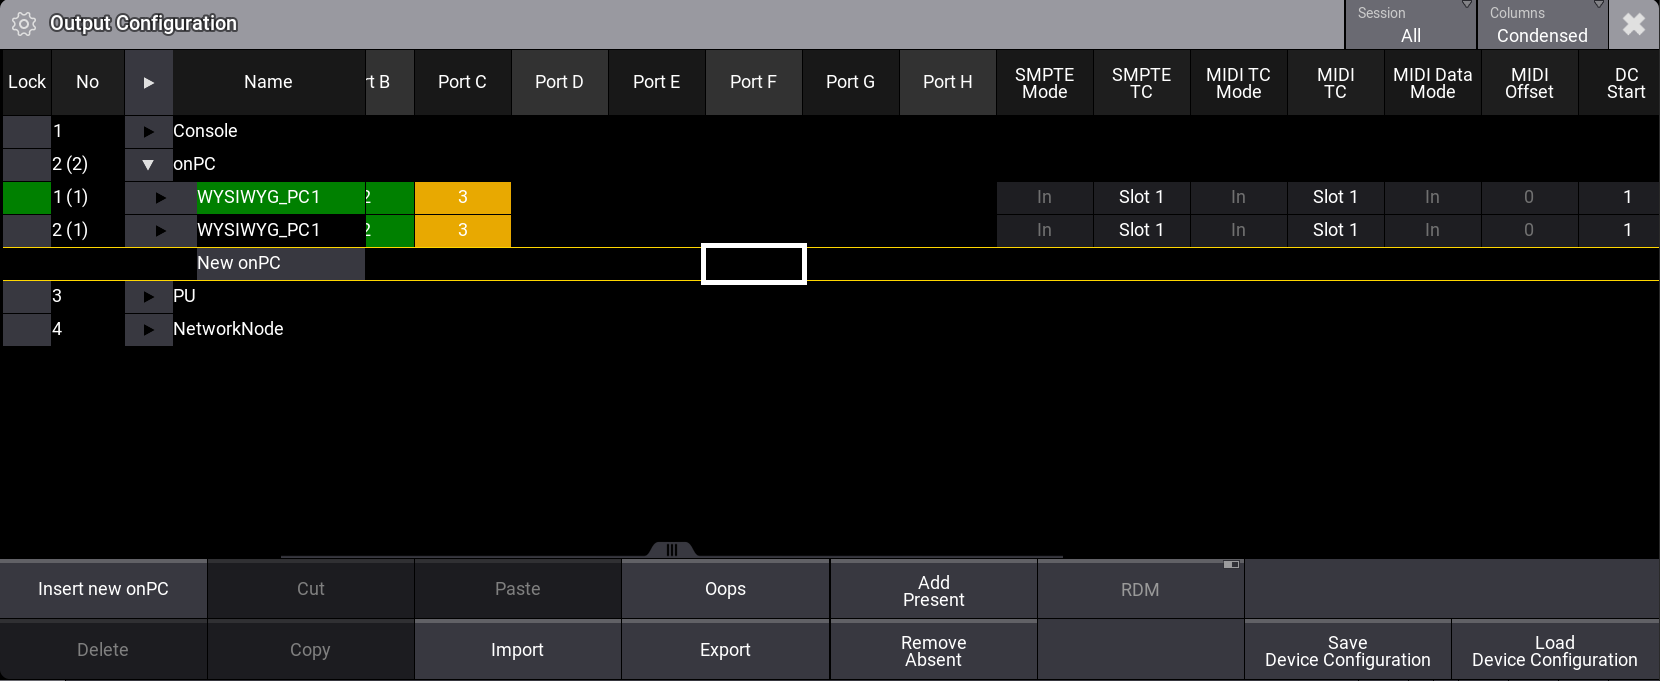
Output Configuration menu
- Tap Columns in the title bar and set it to Condensed.
- Tap and hold a cell in the SMPTE Mode column and set the mode to In. (The default mode is In).
- Tap and hold a cell in the SMPTE TC column to open the TC slot pop-up list. (The default is Slot 1).
- Select the slot that will receive the external SMPTE signal.
- Store a new object in the Timecode Pool, label it, and select it. For more information, see Windows, Views, and Menus.
- Tap Settings in the title bar of the timecode window. For more information, see Timecode settings.
- Tap TC Slot and select a slot from 1 thru 8. This must match the SMPTE TC slot set in the Output Configuration menu.
- Tap Setup in the title bar of the timecode view.
- Assign a new Target to a track. For more information, see Toggle view mode.
- Turn on the Playback Toolbar. For more information, see Timecode Settings.
- Tap
 in the Playback Toolbar to start recording.
| Hint: | |
| At this point, the timecode show is pending. The cursor will start moving when the external signal is detected. |
- To record a cue, press the corresponding target executor key. For more information, see Toggle view mode.
- To record fader movements, move the corresponding target fader.
- To finish recording, tap
 in the toolbar.
MIDI:
- Connect the external MIDI source to the MIDI In connector at the back of the console. For more information, see Device overview.
- Press Menu, then tap Connector Configuration. This will open the Output Configuration menu.

- Tap Columns in the title bar and set it to Condensed.
- Tap and hold a cell in the MIDI TC Mode column and set the mode to In. (The default mode is In).
- Tap and hold a cell in the MIDI TC column to open the TC slot pop-up list. (The default is Slot 1).
- Select the slot that will receive the external MIDI signal.
- Store a new object in the Timecode Pool, label it, and select it. For more information, see Windows, Views, and Menus.
- Tap Settings in the title bar of the timecode window. For more information, see Timecode settings.
- Tap TC Slot and select a slot from 1 thru 8. This must match the slot set for MIDI in the Output Configuration menu.
- Tap Setup in the title bar of the timecode view.
- Assign a new Target to a track. For more information, see Toggle view mode.
- Turn on the Playback Toolbar. For more information, see Timecode Settings.
- Tap in the Playback Toolbar to start recording.
| Hint: | |
| At this point, the timecode show is pending. The cursor will start moving when the external signal is detected. |
- To record a cue, press the corresponding target executor key. For more information, see Toggle view mode.
- To record fader movements, move the corresponding target fader.
- To finish recording, tap in the toolbar.
ArtTimeCode:
- Connect a cable to one of the 3 Ethernet interfaces at the back of the console.
- Press Menu, then tap DMX Protocols:
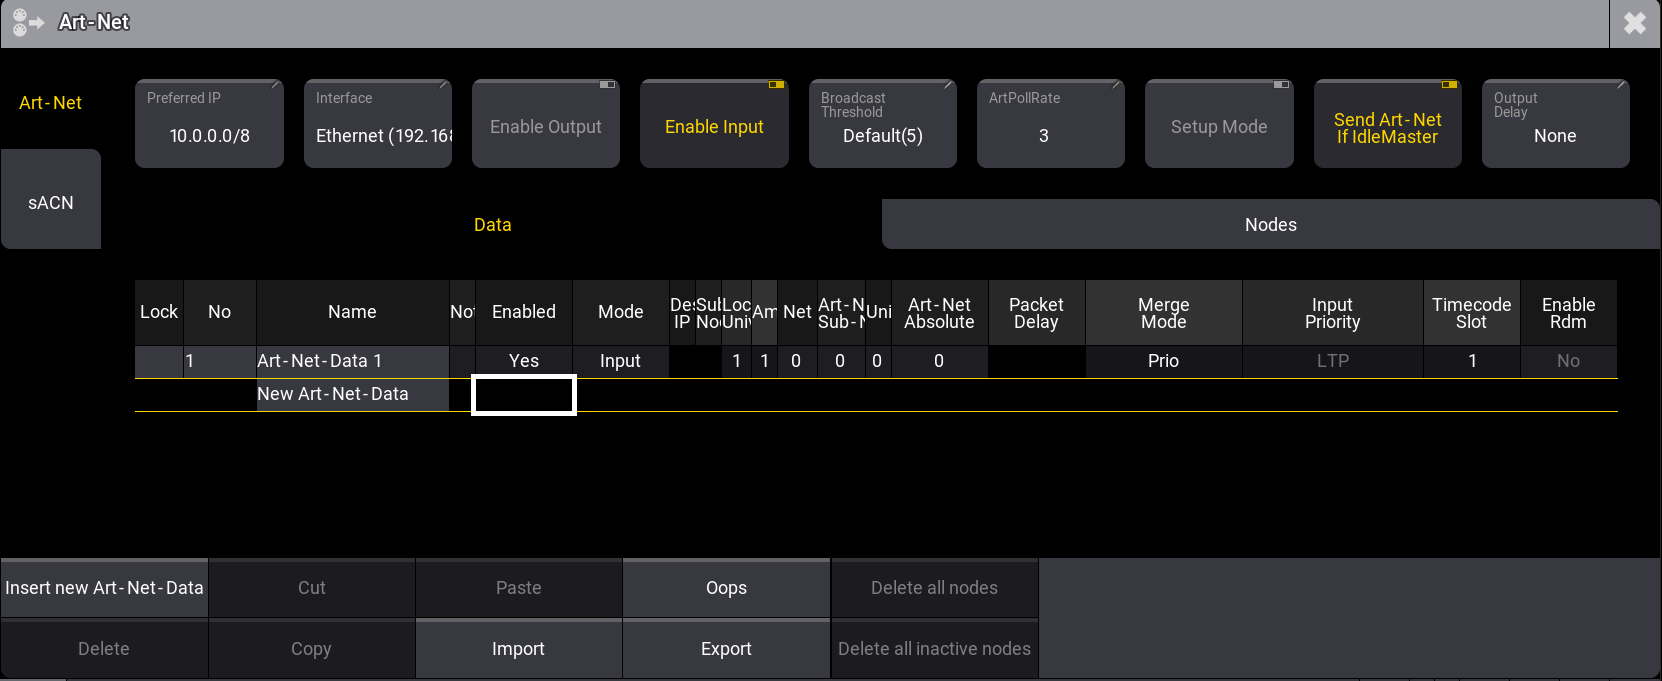
Art-Net configuration menu
- Tap Art-Net in the top left corner.
- In the Mode column, tap and hold a cell; from the pop-up list, tap Input.
- In the Timecode Slot Column, tap and hold a cell to open the calculator, then enter the slot number that will receive the external signal.
- Set the Interface IP address and Enable Input. For more information, see Art-Net menu.
- Store a new object in the Timecode Pool, label it, and select it. For more information, see Windows, Views, and Menus.
- Tap Settings in the title bar of the timecode window. For more information, see Timecode settings.
- Tap TC Slot and select a slot from 1 thru 8. This must match the Timecode slot number set in the Art-Net configuration menu.
- Tap Setup in the title bar of the timecode view.
- Assign a new Target to a track. For more information, see Toggle view mode.
- Turn on the Playback Toolbar. For more information, see Timecode Settings.
- Tap in the Playback Toolbar to start recording.

Hint: At this point, the timecode show is pending. The cursor will start moving when the external signal is detected. - To record a cue, press the corresponding target executor key. For more information, see Toggle view mode.
- To record fader movements, move the corresponding target fader.
- To finish recording, tap in the toolbar.