

- grandMA3 User Manual
- grandMA3 Quick Start Guide
- 00 Welcome
- 01 New Show and Setup
- 02 First Patch
- 03 First View Setup
- 04 Control Simple Fixtures
- 05 3D Fixture Setup
- 06 Groups, Appearances, and Scribbles
- 07 Macros
- 08 Store Cues and Use Executors
- 09 Add Moving Lights
- 10 Presets
- 11 Phasers
- 12 Sequence with multiple cues
- 13 Network and How to Output DMX
- grandMA3 Quick Manual consoles
- grandMA3 Quick Manual processing units
- grandMA3 Quick Manual Nodes
- grandMA3 Quick Manual Nodes DIN-Rail
- grandMA3 Quick Manual onPC command wing XT
- grandMA3 Quick Manual onPC command wing
- grandMA3 Quick Manual onPC fader wing
- grandMA3 Quick Manual onPC rack-unit
- grandMA3 Quick Manual viz-key
- grandMA3 Quick Manual I/O Nodes
- Release Notes
New help version
The help version you selected belongs to an older software version. You may want to view the latest help version.
Macros
A macro is a command or a set of several commands, that can be executed when the macro is called.
Macros are stored in the Macro Pool. The previous chapter introduced the pools and how to use them.
So, create a macro pool somewhere in the user-defined area and edit the first empty pool object.
The macro editor looks like this:
![]()
In the editor, we can create macro lines. Each line is executed one by one. A macro needs at least one line.
The commands are the same as the ones we use in the command line input.
We do not write a please command at the end, it is automatically added if the Execute column says Yes.
Click Insert new MacroLine.
Now we have a macro line where we can add a Command.
We are going to create a simple macro that saves the show.
Edit the command field in the macro line and write SaveShow. It is important that it is one word.
Edit the Name input button at the top of the editor and write Quicksave.
Close the editor and click the macro in the pool:
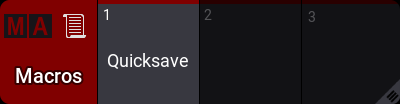
This was one of the most simple macros. A single keyword that saves our show.
Macros can be more complex using elements like user-defined variables. That is outside the scope of this Quick Start Guide.
We are going to create another macro. It mimics the store key.
Edit a new empty macro pool object. Add a new macro line and write Store.
Edit the name and change it to "Store@".
So far it is all the same process as the previous macro. but now you need to change the Yes in the Executor column to a No by right-clicking the Yes.
The difference is that this macro line now does not automatically execute itself allowing you to add more information or a destination. It basically puts "Store" in the command line waiting for you to do more.
Let us do one more macro.
Edit a new empty macro pool object.
Now click Import.
This opens a long list of previously exported macros and factory-created macros. Scroll down the list and find "Help Context Sensitive", select it and click Import.
Now you have imported all the settings for this macro including a macro name. You can close the macro editor.
This macro can be used to open relevant help pages. Try it out by clicking the macro and then the macro pool title field. This opens the help page about macros.
Add more macros if you feel like it - I like having a Clear macro.
You can click the macros in the pool to run them. They can also be triggered by a command. For example, Macro 1.
Recap
This chapter was a quick look at the macro system.
The main manual has an entire Macro section about macros.
Feel free to add more macros in the next chapters if there are keys or keywords that are difficult to reach or just if you feel it makes sense.
In the next chapter, we are finally going to create some cues.