

- grandMA3 User Manual
- grandMA3 Quick Start Guide
- 00 Welcome
- 01 New Show and Setup
- 02 First Patch
- 03 First View Setup
- 04 Control Simple Fixtures
- 05 3D Fixture Setup
- 06 Groups
- 07 Appearance
- 08 Scribbles
- 09 Macros
- 10 Store Cues and Use Executors
- 11 Add Moving Lights
- 12 Control Moving Lights
- 13 Presets
- 14 Phasers
- 15 Sequence with multiple cues
- 16 Network and How to Output DMX
- grandMA3 Quick Manual consoles
- grandMA3 Quick Manual processing units
- grandMA3 Quick Manual Nodes
- grandMA3 Quick Manual Nodes DIN-Rail
- grandMA3 Quick Manual onPC command wing XT
- grandMA3 Quick Manual onPC command wing
- grandMA3 Quick Manual onPC fader wing
- grandMA3 Quick Manual onPC rack-unit
- grandMA3 Quick Manual viz-key
- grandMA3 Quick Manual I/O Nodes
- Release Notes
New help version
The help version you selected belongs to an older software version. You may want to view the latest help version.
Store Cues and Use Executors
Table of contents of this topic
There are different terms that you need to learn.
Cue
A Cue stores different values from fixture attributes. They can contain more than just the attribute values; it is all about the output to the fixtures. Cues also have information on how to transition between different cues.
Each cue has a unique cue number.
Cues actually consist of Cue Parts. This means that if we store values in cue 5. Then the values are actually stored in cue 5 part 0. We often just talk about this as cue 5 and only mentions the parts when they are relevant, and there are more than just part 0.
Sequence
The cues are stored in a Sequence. The sequences have a list of cues sorted by the cue number. This means that cue number 4 cannot be before cue number 3.
The grandMA3 can handle an almost unlimited number of sequences and many cues for each sequence.
The sequences are stored in a sequence pool. When we playback (or "run") a cue, it is actually played back from the sequence pool.
There is always a selected sequence. The default color for indicating a selected pool object is a thick yellow frame.
If we do not specify a sequence, the grandMA3 assumes that a sequence command is for the selected sequence.
Executors
Executors are used to controlling different objects. One of the objects is the sequences.
Executors can also be called Playbacks. There are different executor hardware: Executor Buttons, Executor Faders, and Executor Knobs.
All faders and knobs have a button attached. Not all buttons have a fader or knob attached.
On the grandMA3 onPC, you can open an on-screen version of the executor hardware by pressing F5.
It is important to know that the sequences are not playing back from the executors. The executor sends control commands to the sequences running from the sequence pool.
This also means that if several executors control the same sequence, they share the sequence status.
Create Some Cues
We will create some cues, but first of all, we need a window where we can see the sequence. Click the default view called "Sequence Sheet". It is a starting point; you can modify it if you like it.
The window you need is called Sequence, and if you want to create one from scratch, it is found in the "Common" tab in the Add Window pop-up.
The sequence sheet shows the selected sequence. We have not created a sequence yet, but the first sequence pool object is already selected.
Select group 1 and give the fixtures a value of 100%.
Press Store and then Please.
Now we have stored the programmer values into Cue 1 in Sequence 1.
When we did not specify a location, the selected sequence was used, and it stores the values in the first available cue.
You can see the cue in the sequence sheet.
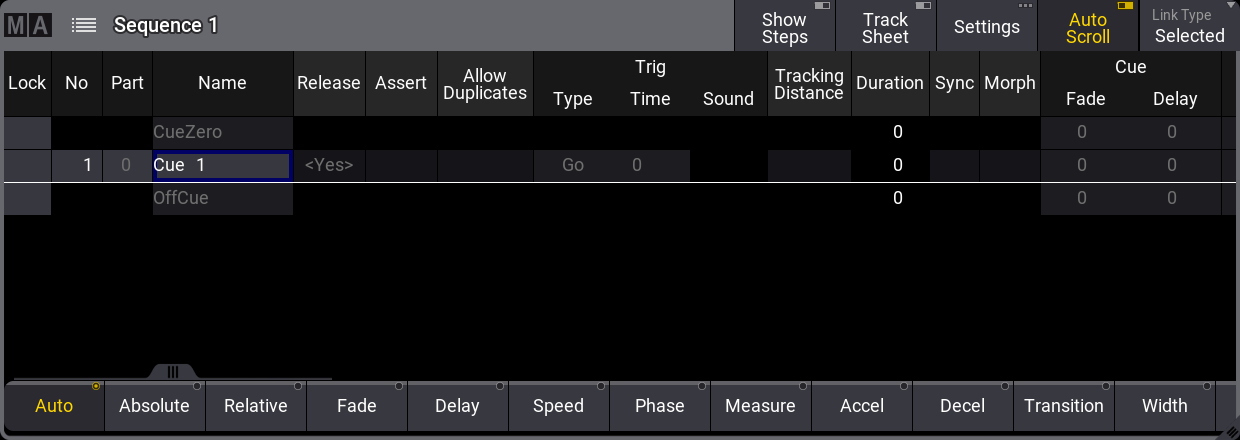
A sequence always contains two default cues: CueZero and OffCue. The OffCue controls different timings when the sequence is turned Off.
Cues are rows in the sheet. The different columns represent different settings for the cue.
There are many columns in the sequence sheet - let us look at some of the most important ones.
No is the cue number.
Part is the cue part number.
Name is the cue (part) name.
In the group of three Trig columns, there is one called Type. It describes what triggers the cue.
If you look at Cue 1, the type is "Go". This means that to execute the cue, you need to press a 'Go' key.
Cue Fade defines the time it takes to fade to the stored values in the cue. Cue Delay defines if there should be a delay between the trigger and the fade start.
Run the Cue
We want to trigger the cue. We will do this using a combination of the command line and the Sequence Pool.
If you do not have a visible Sequence Pool, please make room for one and create it in the user-defined area.

In the command line, write Go and then tap the sequence in the pool.
Now the sequence is outputting the stored values in cue 1.
An easier way to control the sequence is the executors and Master Area.
On the grandMA3 hardware, the master area is the two long faders and the three dedicated buttons for 'Go+', 'Go-' and 'Pause'. Some hardware also has some extra buttons and knobs above the faders.
On the grandMA3 onPC, we can open an on-screen version of the master area by pressing F7 on a keyboard - here, it is the middle part of the pop-up.
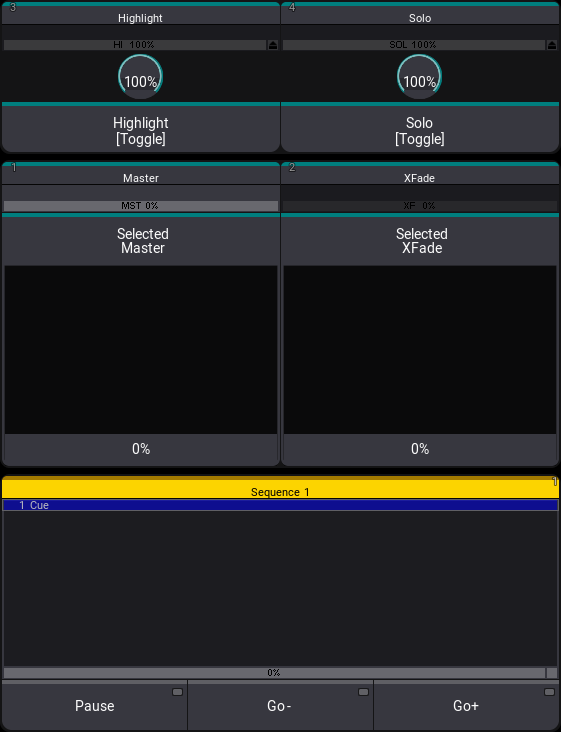
The master area always controls the selected sequence. The default function for the left fader is an output master. Moving it up and down adjusts the output level of the fixtures.
Assign Sequence Control to Executors
We can also assign sequence controls to other executors.
The on-screen version of the executors can be opened by pressing F5 on a keyboard.
![]()
The on-screen executors can be created as a window. It is called Playback and is in the 'Common' tap.
I have created a window with the playbacks for the next step. If you are on the onPC, I suggest you do the same.
On the grandMA3 hardware, these executor buttons are not numbered as they are in the software. They have small horizontal lines on the buttons indicating the hundreds number.
The leftmost column of executors are the first. This means that the bottom executor in the lower-left corner is executor 101. It got one horizontal line.
The button above this is 201; it is connected to the fader.
The button above the fader is 301, and it got a rotating knob.
The top button is 401, and it also got a rotating knob.
The next column is the second's executors for each hundred: 102, 202, 302, and 402.
Each executor is its own and can send control commands to different objects. But they can also be grouped together.
We want the left fader executor to control our sequence.
Press Assign Sequ 1 and press the executor button 201.
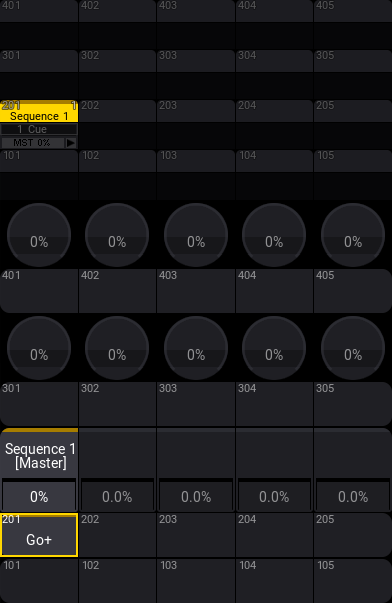
Now we can move the left executor fader, and it also controls the master intensity for the sequence. Notice that the master in the Master Area also moves. Both faders do the same thing for Sequence 1.
Create More Sequences
Now we are going to create more sequences.
Clear your programmer and select group 2.
Give the fixtures 100% intensity.
Press the Store macro and then the executor button 202.
Now we have two faders, each controlling their own fixtures.
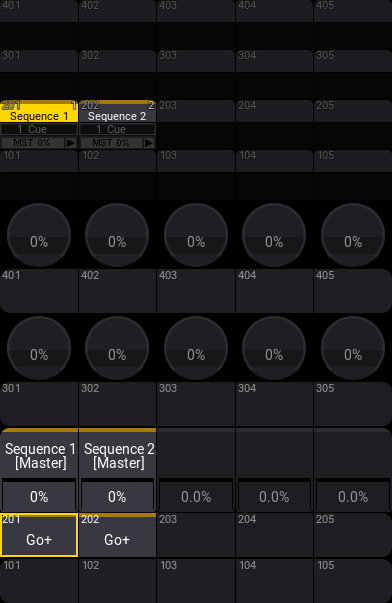
When we pressed the executor button, the grandMA3 software automatically created a new cue 1 in a new sequence and assigned the sequence as the object on executor 202.
Clear the programmer, repeat the steps above for group 4 (Even Blinders), and store them to executor 203. And finally, store group 5 at 100% on executor 204.
We should name/label the four sequences in the sequence pool to match the group names.
Now you have four faders that each control some of the fixtures.
Modify the Executors
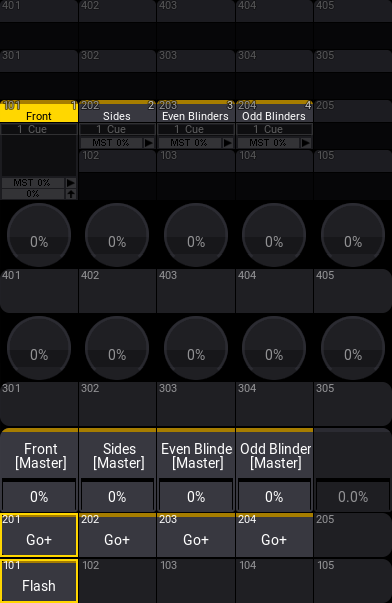
Let us try to modify the controls to give us some more buttons. We would like to use the 101, 102, 103, and 104 as flash buttons for the sequences above.
We could make these buttons separately control the sequences and just have a flash button on them, but we could also expand the executor and group the executors for each sequence.
Press Move and press executor 201 and then 101.
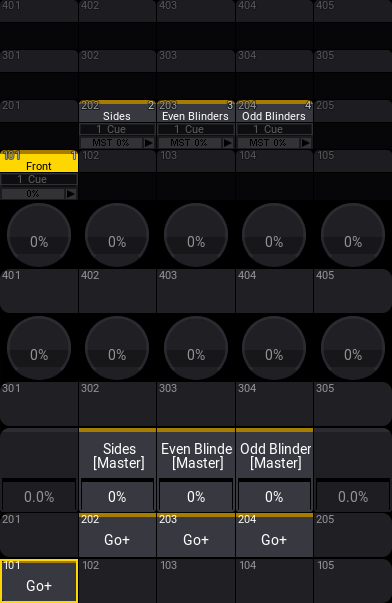
Now we have moved the executor from 201 to 101, and we only have a single executor button to control the sequence.
We need to configure the assignment of the executor buttons. Press Assign and then the executor button 101.
Now the Assign Menu opens on one of the screens. We need to expand the executor to include the 200th row in this menu.
Tap the 200 button:
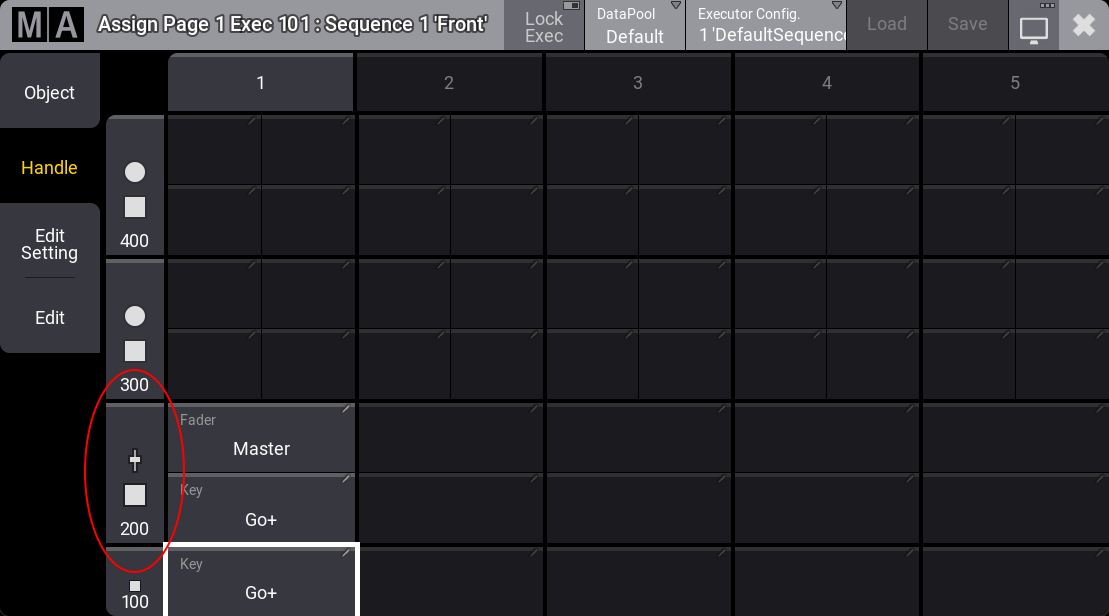
This expands the executor in height; it now includes the two executor buttons and the fader.
Now we need to change the assignment on the lower button. Tap the button in the assign menu.
This gives us a small select pop-up with valid options for the button. Tap Flash in the small pop-up.
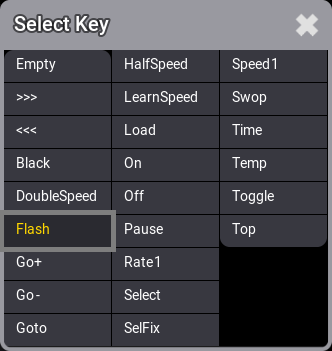
This has now changed the function (or command) assigned to the button. It got a cyan line at the top to indicate that this is different than the default assignment for this executor configuration.
We can save this as a new default.
Tap Save in the title bar of the Assign Menu.
Close the Assign Menu by tapping the ![]() in the upper right corner.
in the upper right corner.
Let us try the new function. Turn down all the faders and press executor button 101. You should see the fixture flash in the 3D window and the fixture sheet.
Ok, let us do the same for the other executors.
Press Assign and then executor 202. In the Assign Menu, we see that the 100 button is grayed out. This means that we cannot expand the executor down.
Executors can only be expanded up and to the right and only if the space is not occupied. A final expansion rule is that we cannot expand outside the grouping of 5 columns. This means that executor 105 cannot expand to the right to executor 106 even if it is empty.
To continue our task, we need to move the executors down before we can expand them up.
Press Move and then executor button 202 and then executor button 102. If you still have the Assign Menu open, you will see that it updated the view, and now executor 102 can be expanded to 202. Doing so automatically changed the button function to the new default we just stored for 101.
Now also expand executors 203 and 204 by moving them and then expanding them.
Try out the new flash buttons.
Flash can be combined with having the faders up. If the fader is at 100%, then the flash does not have a function, but having the faders at 25% and flashing is a visible combination.
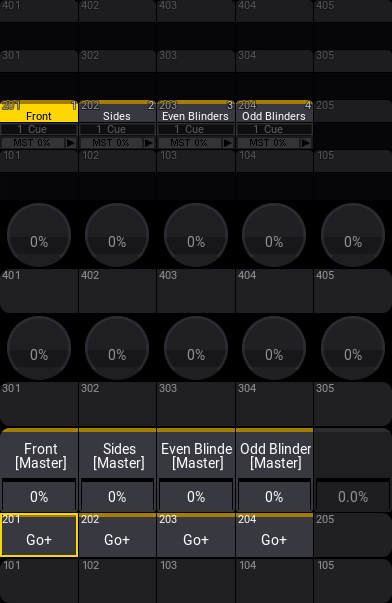
Now the executors look like this in a Playback window:
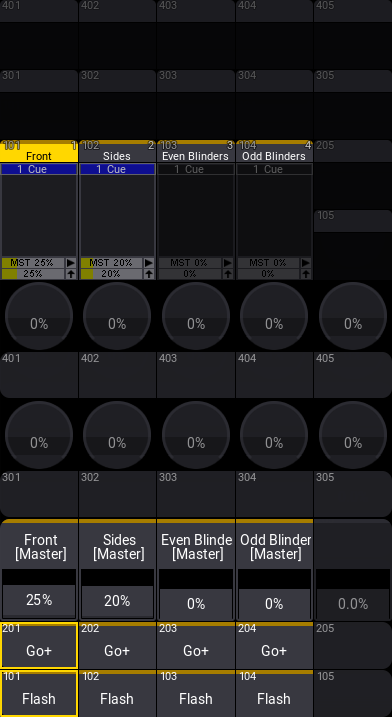
Notice that the sequence called "Front" has a yellow color in the executor label. This indicates that this is the selected sequence.
Recap
In this chapter, we stored some cues in different sequences and made some executors control the sequences. We also adjusted the executors to match our needs.
Read the Look at Cues and Sequences topic to learn details about the Sequence Sheet window.
The Assign menu is described in detail in the Assign Object to an Executor topic.
The next chapter is about adding moving lights. Your onPC or console needs access to the internet for the best result in the next chapter.