

- grandMA3 User Manual
- grandMA3 Quick Start Guide
- 00 Welcome
- 01 New Show and Setup
- 02 First Patch
- 03 First View Setup
- 04 Control Simple Fixtures
- 05 3D Fixture Setup
- 06 Groups
- 07 Appearance
- 08 Scribbles
- 09 Macros
- 10 Store Cues and Use Executors
- 11 Add Moving Lights
- 12 Control Moving Lights
- 13 Presets
- 14 Phasers
- 15 Sequence with multiple cues
- 16 Network and How to Output DMX
- grandMA3 Quick Manual consoles
- grandMA3 Quick Manual processing units
- grandMA3 Quick Manual Nodes
- grandMA3 Quick Manual Nodes DIN-Rail
- grandMA3 Quick Manual onPC command wing XT
- grandMA3 Quick Manual onPC command wing
- grandMA3 Quick Manual onPC fader wing
- grandMA3 Quick Manual onPC rack-unit
- grandMA3 Quick Manual viz-key
- grandMA3 Quick Manual I/O Nodes
- Release Notes
New help version
The help version you selected belongs to an older software version. You may want to view the latest help version.
Appearances
Appearances are a defined look that can be applied to most objects. In this chapter, I will introduce you to appearances, but we will not create specific appearances that we will use later. You are, however, very welcome to continue to add appearances to objects in future chapters.
The appearances are organized in an Appearance pool. A new show already has some appearances in the pool. These can be used like any other appearance you create.
Most objects in the grandMA3 have the option to add an appearance. The purpose is to customize the look of the objects. This can be used as indicators of different fixture types, special cues, or to add icons or images to elements for faster identification.
Images
Images can be used in appearances. There is a separate pool for images. Images can be imported into the pool.
I am going to import and use this image:
![]()
Right-click the image above and save it on your computer if you want to follow the example.
The image needs to be stored at a specific location for the grandMA3 to be able to find it.
It is easiest to have a USB flash drive that you use to import, export, and store show. The drive needs a specific file structure for the grandMA3 software to find specific files. The file structure is created when you use the flash drive with the software. You get the needed structure if you insert a stick and save the show to the USB flash drive.
The image needs to be saved in \grandMA3\gma3_library\media\images
If you do not use a USB stick, you need to locate where the program data is stored on your computer.
On a windows machine where it is stored at the default drive, it is located at C:\ProgramData\MALightingTechnology\grandMA3\gma3_library\media\images
On Apple Mac machines it is loacted at [System HD]/Users/[User Name]/MALightingTechnology/grandMA3/gma3_library/media/images
Again, I will recommend using a USB stick for all imported, exported, and saved files. It makes it easier to move files between consoles and onPC.
With the image at the correct location on a USB flash drive or hard drive, we can import it to the image pool.
Create the image pool in the user-defined area.
Right-click the first empty pool object. This opens the image editor:
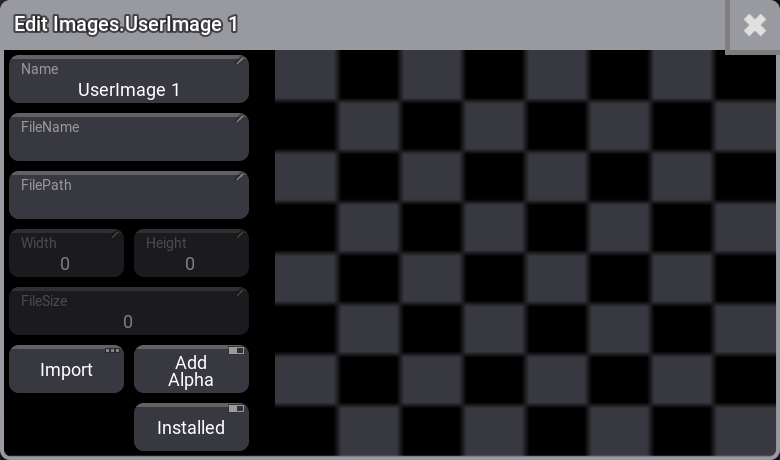
Click Import, and now we get a new pop-up used to import an image:
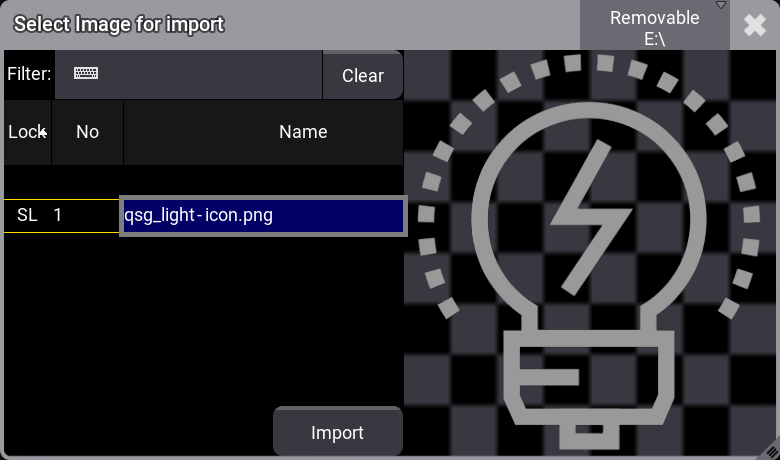
Change to the drive where the image file is stored. I have changed to the USB flash drive in the drive selection in the title bar. Then you should be able to select the image.
Click Import.
Now close the image editor by clicking the ![]() in the upper right corner. Now the image is in the image pool and can be used in appearances.
in the upper right corner. Now the image is in the image pool and can be used in appearances.
If you want to use custom image icons, it is a good idea to use a png file with a transparent background and a white icon. Then a colored background can be added to the appearance, and the icon can be colored to create different appearances using the same icon.
Back to Appearance
You create an appearance by editing an empty appearance object in the Appearance pool. There are already some predefined appearances, so you might need to scroll the pool to find an empty pool object.
Edit an empty appearance pool object.
The editor looks like this:
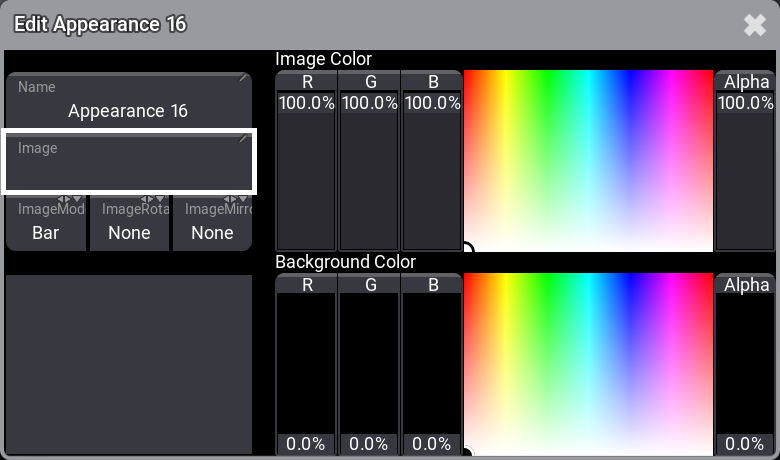
The left side allows you to change the name, add an image, control how the image is adjusted to the size and see a preview.
The right side is two sections with color selection. The top one adjusts the image color. The bottom one adjusts the background color. It can only subtract existing colors from the image. It can, however, add color to a transparent background.
Click Image.
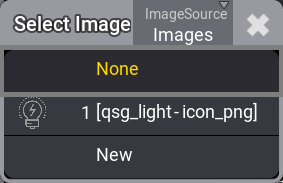
Select the image we imported.
Now adjust the colors to match your needs.
Close the editor when you are happy.
The appearance can be assigned to a lot of different objects.
In the previous chapter, we looked at the Swipey menu. One of the options here is 'Assign'. This can be used to assign the appearance. Let us try to assign the new appearance to the first group. You need to have the Appearances pool and Groups pool visible.
Open the Swipey menu on the appearance and select the Assign option. Now click the first group. This assigns the appearance to the group.
Use the Swipey menu on the group and select the Edit Settings option. This opens the editor for the group pool object.

Many editors have an appearance setting that can be used to select an appearance.
Tap the Appearance button. This opens a small select pop-up with all the appearances and the options to select 'None' and 'New'. Select the desired appearance - this closes the select pop-up. Close the Edit Group pop-up by clicking the ![]() in the upper left corner.
in the upper left corner.
You cannot assign an appearance to other appearances or any image.
Recap
In this chapter, we looked at appearances and Images as tools to create custom indications and marking of objects.
The main manual also has a section for Images and Appearances. They have more details on the different functions.
We will not talk more about appearance, but feel free to add more and use them in the rest of the chapters.
The next chapter is about another useful customization tool - Scribbles.