

- grandMA3 User Manual
- grandMA3 Quick Start Guide
- 00 Welcome
- 01 New Show and Setup
- 02 First Patch
- 03 First View Setup
- 04 Control Simple Fixtures
- 05 3D Fixture Setup
- 06 Groups
- 07 Appearance
- 08 Scribbles
- 09 Macros
- 10 Store Cues and Use Executors
- 11 Add Moving Lights
- 12 Control Moving Lights
- 13 Presets
- 14 Phasers
- 15 Sequence with multiple cues
- 16 Network and How to Output DMX
- 17 Recipes
- grandMA3 Quick Manual consoles
- grandMA3 Quick Manual processing units
- grandMA3 Quick Manual Nodes
- grandMA3 Quick Manual Nodes DIN-Rail
- grandMA3 Quick Manual onPC command wing XT
- grandMA3 Quick Manual onPC command wing
- grandMA3 Quick Manual onPC fader wing
- grandMA3 Quick Manual onPC rack-unit
- grandMA3 Quick Manual viz-key
- grandMA3 Quick Manual I/O Nodes
- Release Notes
Add Moving Lights
In this chapter, we will return to the patch and add some moving lights.
We are going to add a variety of fixtures, and we are going to hang them on our fictive fixture pods.
World Server
This time we are going to get the fixtures from the Internet. The files come from https://gdtf-share.com. You can find and download fixtures from the website. We can also import them directly from the grandMA3 onPC or console when there is a connection to a World Server. MA Lighting offers a public world server to connect to.
Let us start by checking the connection. The command line input bar has a globe icon on the right-hand side.
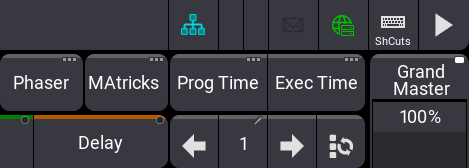
A green globe indicates that there is a good connection to the server. If this is true, you can jump to Fixture Share Library below. Keep reading to learn how to change the address of the world server.
If the globe is black, there is no internet connection, or the server address is wrong.
I cannot help you with the internet connection, but we can check that the world server address is correct.
We need to have a look at the Network menu. We will return to networking in a future chapter. For now, we will concentrate on the world server.
Click the ![]() (or press Menu) and click Network in the pop-up. This is the interesting part:
(or press Menu) and click Network in the pop-up. This is the interesting part:

The World Server address must be correct when the computer running grandMA3 onPC has an internet connection. Type worldserver.malighting.de into the WorldServer input. It should already be this in a new empty show, but it is good to check.
Consoles need internet access on one of the Ethernet connectors on the back to connect to the server.
The server is the same for consoles and onPC.
You can close the network menu. Hopefully, the globe will turn green.
Fixture Share Library
We are going to import fixtures from the world server. If you cannot access the server, just use the standard library. The fixture types will maybe not be as good, but they will function for us in the rest of the quick start guide.
We need to get back into the Patch. You should remember how otherwise, review chapter 2.
Select New Fixture at the bottom of the list - make sure not to select the one inside the Blinder grouping fixture.
Click Insert new Fixture.
We need to import new fixtures from a library, so click Library. The upper right corner of the pop-up has some buttons that can be used to select different library sections. The default is that the MA library (![]() ) and the user create files (
) and the user create files (![]() ) are active, but we can also activate the library section from the world server by turning On the globe icon
) are active, but we can also activate the library section from the world server by turning On the globe icon ![]() .
.

Now we can also search through the online fixture libraries. Here we can access user-created fixtures and fixtures created by the manufacturers themself.
We want to import an "Impression X4 Bar 10" fixture from GLP in a "Single Pixel High Resolution" mode.
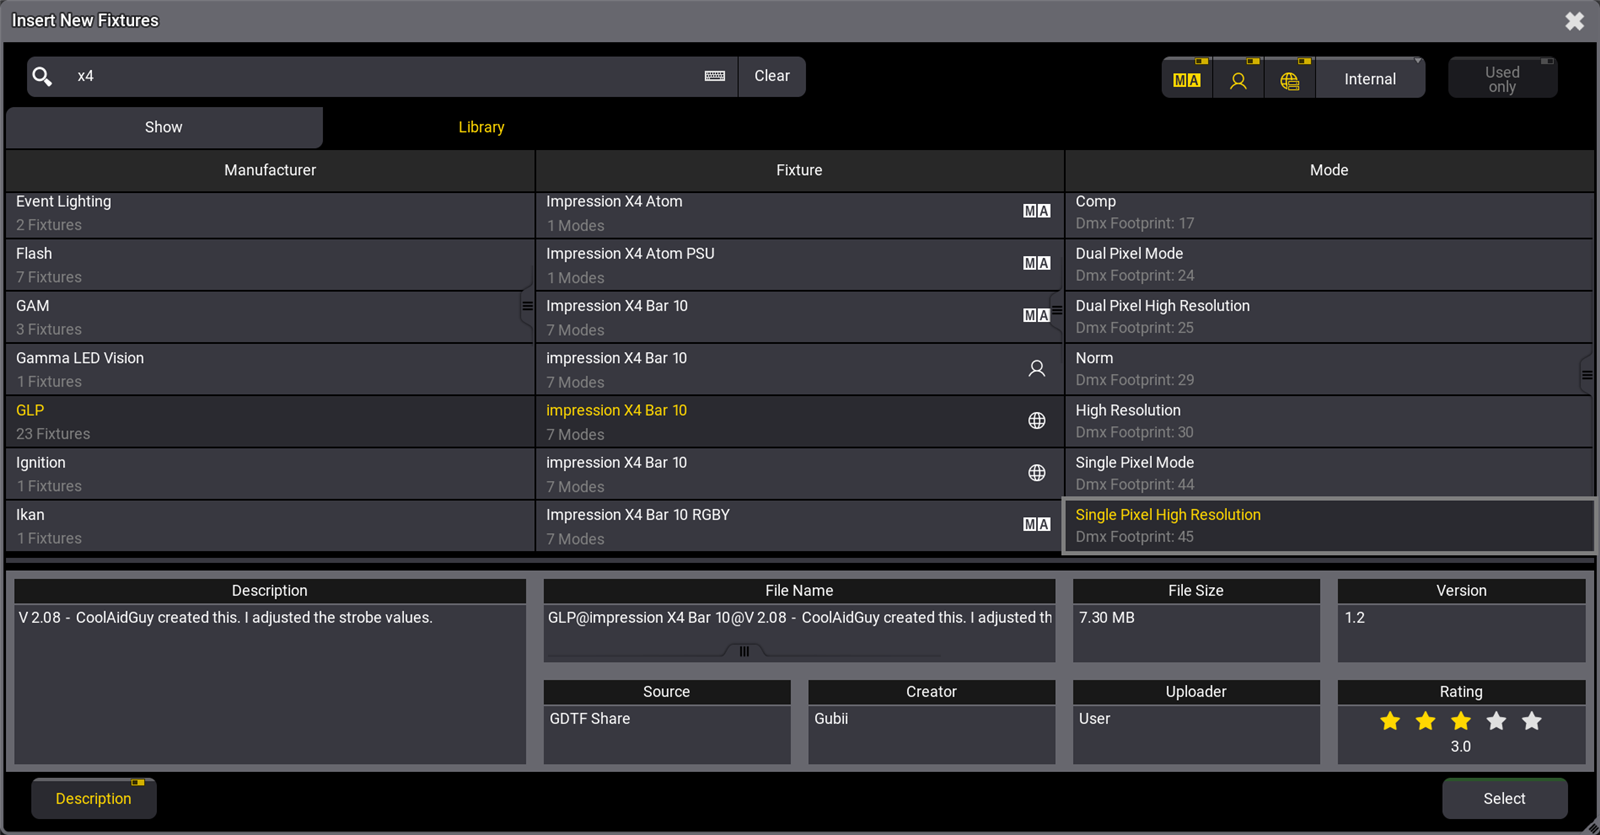
We can see some details about a fixture by turning On the 'Description'. It is a button in the lower left corner.
In the description, we can see the Source information. In the example above, we can see that the source is "GDTF Share". We can also see next to "Fixture" in the list above that there is a globe icon next to the fixture type I have selected.
Please make sure you select exactly the same fixture and mode as the one in the image above. There might be more versions on the world server by different Creators. Select the one uploaded by User "Gubii".
If you cannot access the world server, just select the one from the "MA" library. It might not look correct in the 3D viewer, but it controls and behaves the same.
When you click Select, it might take some time to download and import the fixture type.
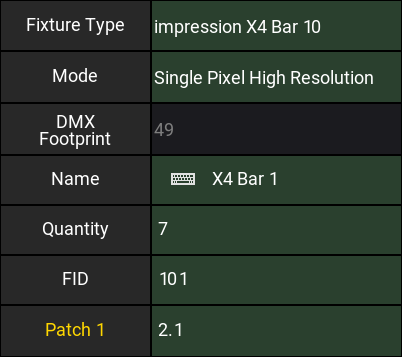
You need to add 7 fixtures starting with the name "X4 Bar 1" and FID "101". They need to be patched to universe 2 from address 1.
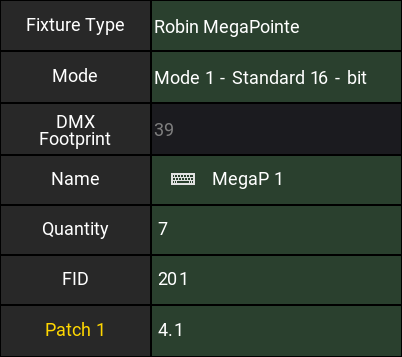
The next fixture type we need is the "Robin MegaPointe" from Robe Lighting using "Mode 1". Again from the GDTF Share.
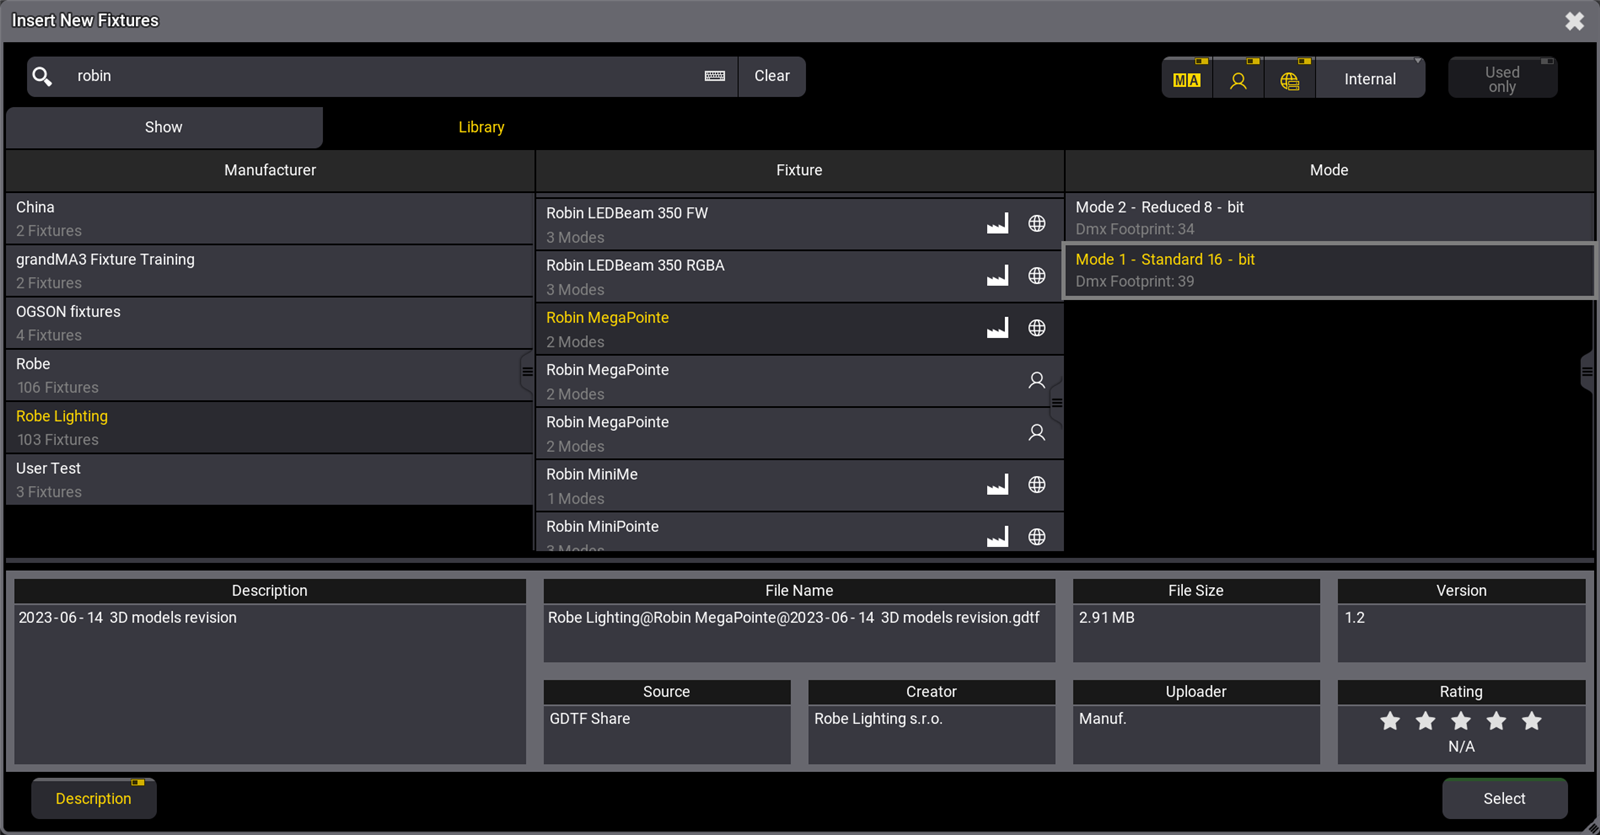
Notice in the image above that the manufacturer has uploaded their fixtures under the Manufacturer name "Robe Lighting". These are the fixtures we need.
Manufacturer-uploaded fixtures get a factory icon next to the fixture type name.
Again we need 7 fixtures. They should be in universe 4 from address 1. The name for the first fixture should be "MegaP 1". The FID begins at "201".
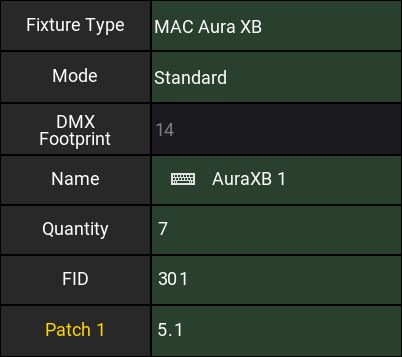
The next fixture type is from Martin Professional. The fixture type "MAC Aura XB" in "Standard" mode. I would select the files uploaded by the factory.
7 fixtures beginning from FID "301", name "AuraXB 1", and in universe 5 beginning with address 1.
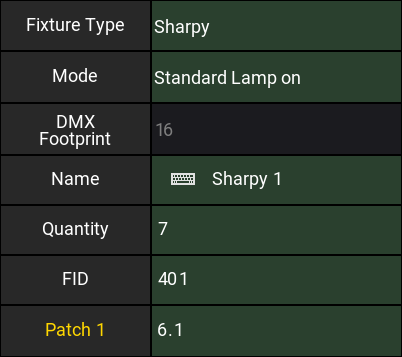
The last fixture type is from Clay Paky. It is a "Sharpy" in mode "Standard Lamp on". I would select the fixture type from the MA library.
Again 7 fixtures from FID "401", name "Sharpy 1" in mode "Standard Lamp on", and starting at DMX address "6.1"
This table contains information about the new fixtures, including the position of the new fixtures.
Remember that you have to change the patch menu to show Full columns to see the position columns.
| FID: | Name: | Manufacturer: | Fixture: | Mode: | Patch: | X-Pos: | Y-Pos: | Z-Pos: |
|---|---|---|---|---|---|---|---|---|
| 101 | X4 Bar 1 | GLP | Impression X4 Bar 10 | Single Pixel High Resolution | 2.001 | -1.5 | 0.5 | 4.5 |
| 102 | X4 Bar 2 | GLP | Impression X4 Bar 10 | Single Pixel High Resolution | 2.090 | 1.5 | 0.5 | 4.5 |
| 103 | X4 Bar 3 | GLP | Impression X4 Bar 10 | Single Pixel High Resolution | 2.179 | -3.0 | 2.1 | 4.0 |
| 104 | X4 Bar 4 | GLP | Impression X4 Bar 10 | Single Pixel High Resolution | 2.268 | 0.0 | 2.1 | 4.0 |
| 105 | X4 Bar 5 | GLP | Impression X4 Bar 10 | Single Pixel High Resolution | 2.357 | 3.0 | 2.1 | 4.0 |
| 106 | X4 Bar 6 | GLP | Impression X4 Bar 10 | Single Pixel High Resolution | 3.001 | -1.5 | 3.6 | 3.5 |
| 107 | X4 Bar 7 | GLP | Impression X4 Bar 10 | Single Pixel High Resolution | 3.090 | 1.5 | 3.6 | 3.5 |
| 201 | MegaP 1 | Robe Lighting | Robin MegaPointe | Mode 1 - Standard 16 - bit | 4.001 | -1.5 | 0.8 | 4.5 |
| 202 | MegaP 2 | Robe Lighting | Robin MegaPointe | Mode 1 - Standard 16 - bit | 4.040 | 1.5 | 0.8 | 4.5 |
| 203 | MegaP 3 | Robe Lighting | Robin MegaPointe | Mode 1 - Standard 16 - bit | 4.079 | -3.0 | 2.4 | 4.0 |
| 204 | MegaP 4 | Robe Lighting | Robin MegaPointe | Mode 1 - Standard 16 - bit | 4.118 | 0.0 | 2.4 | 4.0 |
| 205 | MegaP 5 | Robe Lighting | Robin MegaPointe | Mode 1 - Standard 16 - bit | 4.157 | 3.0 | 2.4 | 4.0 |
| 206 | MegaP 6 | Robe Lighting | Robin MegaPointe | Mode 1 - Standard 16 - bit | 4.196 | -1.5 | 3.9 | 3.5 |
| 207 | MegaP 7 | Robe Lighting | Robin MegaPointe | Mode 1 - Standard 16 - bit | 4.235 | 1.5 | 3.9 | 3.5 |
| 301 | AuraXB 1 | Martin Professional | Mac Aura XB | Standard (16 ch) | 5.001 | -1.0 | 0.8 | 4.5 |
| 302 | AuraXB 2 | Martin Professional | Mac Aura XB | Standard (16 ch) | 5.015 | 2.0 | 0.8 | 4.5 |
| 303 | AuraXB 3 | Martin Professional | Mac Aura XB | Standard (16 ch) | 5.029 | -2.5 | 2.4 | 4.0 |
| 304 | AuraXB 4 | Martin Professional | Mac Aura XB | Standard (16 ch) | 5.043 | 0.5 | 2.4 | 4.0 |
| 305 | AuraXB 5 | Martin Professional | Mac Aura XB | Standard (16 ch) | 5.057 | 3.5 | 2.4 | 4.0 |
| 306 | AuraXB 6 | Martin Professional | Mac Aura XB | Standard (16 ch) | 5.071 | -1.0 | 3.9 | 3.5 |
| 307 | AuraXB 7 | Martin Professional | Mac Aura XB | Standard (16 ch) | 5.085 | 2.0 | 3.9 | 3.5 |
| 401 | Sharpy 1 | Clay Paky | Sharpy | Standard Lamp on | 6.001 | -2.0 | 0.8 | 4.5 |
| 402 | Sharpy 2 | Clay Paky | Sharpy | Standard Lamp on | 6.017 | 1.0 | 0.8 | 4.5 |
| 403 | Sharpy 3 | Clay Paky | Sharpy | Standard Lamp on | 6.033 | -3.5 | 2.4 | 4.0 |
| 404 | Sharpy 4 | Clay Paky | Sharpy | Standard Lamp on | 6.049 | -0.5 | 2.4 | 4.0 |
| 405 | Sharpy 5 | Clay Paky | Sharpy | Standard Lamp on | 6.065 | 2.5 | 2.4 | 4.0 |
| 406 | Sharpy 6 | Clay Paky | Sharpy | Standard Lamp on | 6.081 | -2.0 | 3.9 | 3.5 |
| 407 | Sharpy 7 | Clay Paky | Sharpy | Standard Lamp on | 6.097 | 1.0 | 3.9 | 3.5 |
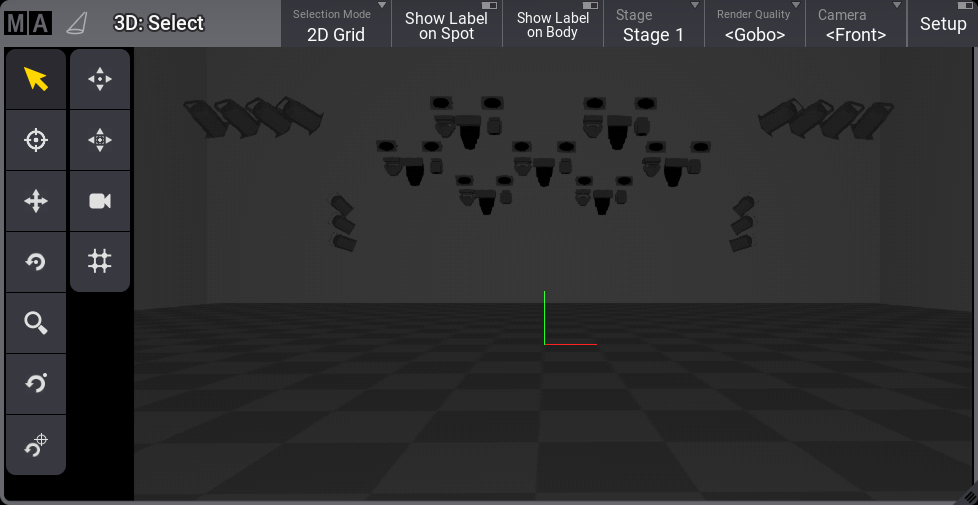
When your patch matches, exit the patch and save the new setup.
The 3D Viewer should look like this:
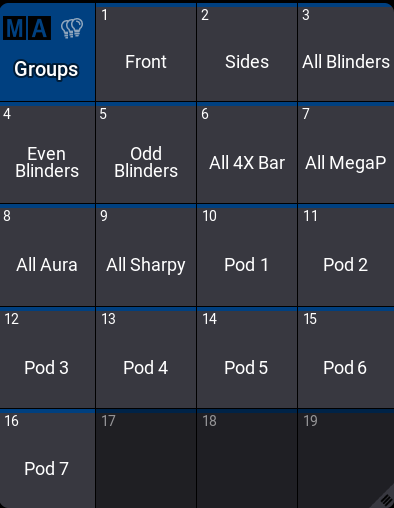
Create new Groups
Create the following groups:
| Group No.: | Group Name: | Fixtures: |
|---|---|---|
| 6 | All X4 Bar | 101 Thru 107 |
| 7 | All MegaP | 201 Thru 207 |
| 8 | All Aura | 301 Thru 307 |
| 9 | All Sharpy | 401 Thru 407 |
| 10 | Pod 1 | 21 + 22 + 101 + 201 + 301 + 401 |
| 11 | Pod 2 | 23 + 24 + 102 + 202 + 302 + 402 |
| 12 | Pod 3 | 25 + 26 + 103 + 203 + 303 + 403 |
| 13 | Pod 4 | 27 + 28 + 104 + 204 + 304 + 404 |
| 14 | Pod 5 | 29 + 30 + 105 + 205 + 306 + 406 |
| 15 | Pod 6 | 31 + 32 + 106 + 206 + 306 + 406 |
| 16 | Pod 7 | 33 + 34 + 107 + 207 + 307 + 407 |
You can create and assign appearances to the groups if you like.
Mine looks like this - no appearances:
Recap
In this chapter, we have added moving light fixtures to our stage and created new groups.
The next chapter is about controlling these fixtures.