

- grandMA3 User Manual
- grandMA3 Quick Manual consoles
- grandMA3 Quick Manual processing
- grandMA3 Quick Manual nodes
- grandMA3 Quick Manual DIN-Rail
- Intended Use
- Safety
- Support
- Transport
- Limitations
- Installation
- Quick Start
- Maintenance
- Disposal
- Technical Data
- Conformity
- grandMA3 Quick Manual onPC solutions
- Release Notes
New help version
The help version you selected belongs to an older software version. You may want to view the latest help version.
Quick Start

-
DMX
-
Ethernet
-
USB port
-
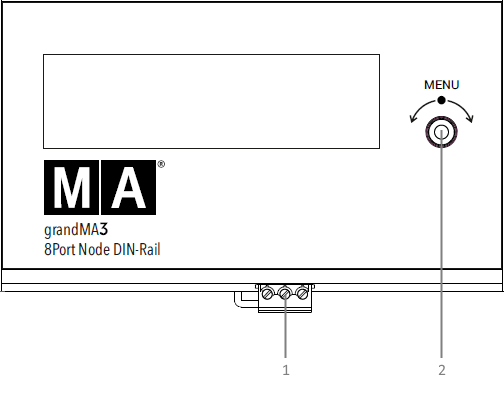
Terminal block
-
Rotary knob
-
Unpack the device.
-
Remove the packaging and cushioning material.
-
Install the device on a rail. For more information see Installation.
-
Download the grandMA3 onPC software on www.malighting.com.
-
Install the software on your PC or laptop. For minimum requirements see System Requirements grandMA3 in the grandMA3 user manual.
-
Start the grandMA3 console or grandMA3 onPC.
-
Connect the grandMA3 xPort Node DIN-Rail with your PC, laptop, or a grandMA3 console using the RJ45 connector.
Connect the grandMA3 xPort Node DIN-Rail with the electrical grid using a terminal block connector, a PoE switch, or a PoE injector.
The device starts booting and the rotary knob starts flashing.
To configure a grandMA3 xPort Node DIN-Rail, use a grandMA3 console or the grandMA3 onPC software.
To turn off the grandMA3 xPort Node DIN-Rail, disconnect the RJ45 connector located on the back or the terminal block connector.