

- grandMA2 User Manual
- grandMA2 Quick Start Guide
- MA 3D
- Help from MA technical support
- Symbols used
- Introduction
- Install and Uninstall
- System Requirements
- Installation
- Uninstall MA 3D
- First Steps
- Hardware connection
- Start MA 3D
- Create a Session
- Data Management
- Master/Slave
- Coordinate system
- Program Surface
- Menu Bar
- Menu Bar - File Menu
- Settings
- Edit
- Functions
- Tools
- View
- Help
- Tool Bar
- Main Windows
- Stage View
- Mouse + Keyboard Actions
- Arrangement of Objects (Align Objects)
- Duplicate (copy 3D Objects)
- 3D Objects
- Assets (Information Window)
- Properties
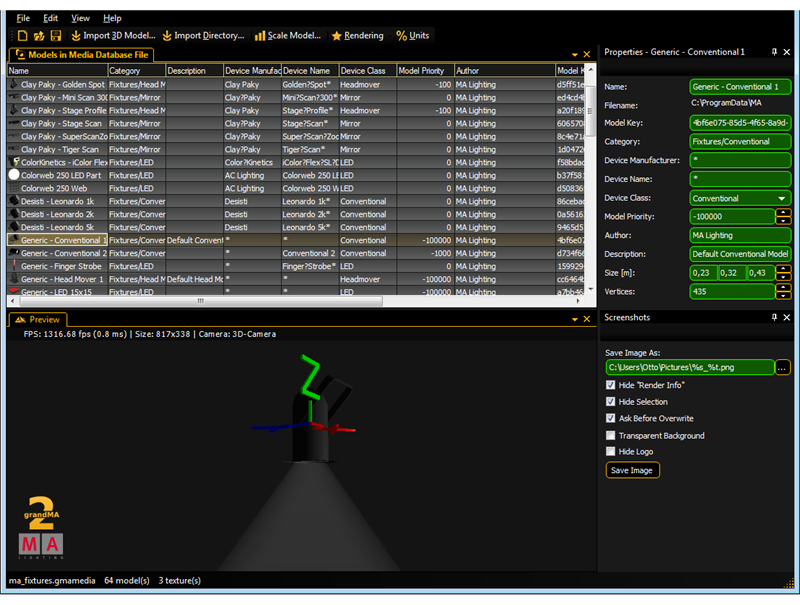
- Media Database
- Materials
- Video Player
- Moving Paths
- Sessions
- Status Bar
- Windows Layout
- Menu Bar
- Fixture Types
- 3D Modeling and Import
- Workflow
- 3D Modeling Principles
- Creation of a 3D Model
- Creation of a 3D Fixture Model
- Import 3D Model to MA 3D
- Assigning of 3D Models to Fixture Types
- Checklist for 3D Modeling
- Automated import
- Parameters
- Axes
- Rotation Axes
- Linear Axes
- Beam of Light (Cone)
- Keyboard Shortcuts
- MA 3D FAQ
- MA VPU
- Release Notes
New help version
The help version you selected belongs to an older software version. You may want to view the latest help version.
3D Modeling and Import
MA 3D is created for the visualization of three-dimensional stage layouts to be utilized together with lighting control desks of MA. It comes with a library of common types of light fixtures e.g., par cans, moving mirror, moving heads and LED fixtures.
With this large number of different fixtures, it is not possible to cover all models. MA 3D offers the opportunity to import 3D models created via a 3D CAD program. Most of the 3D CAD programs offer the export into the .3ds format.
This tutorial requires the knowledge of handling a 3D construction program.
3D models are created with 3D design programs such as ‘Cinema 4D’, 3Ds Max, etc. After creation, the model is imported in .3ds format via the MA 3D import function. The import tool can be found using the menu entry: ‘File – Import – Import 3D Model…’. Single files as well as complete directories can be imported.
It is possible to apply parameters to objects inside a 3D model. These parameters influence the behavior of the object within MA 3D.
The parameters are defined using the name of the object. They are organized in a hierarchic order.
A parameter block begins with '_X'. The sub-parameter follows without separators, e.g., 'Test_XAP' identifies the object as an axis of the pan movement.
For more information see Creation of a 3D Fixture Model and Parameters.
The imported model can be viewed in the ‘Model Test Area’ window that can be operated similarly to the 3D ‘Stage View’.
Properties such as ‘Name’, ‘Category’, etc. can also be edited. After the editing, the model can be stored in the media database and is ready to be used in MA 3D.