

- dot2 User Manual
- New in the Manual
- Introduction
- Intended Use
- System Requirements dot2 onPC
- Installation of dot2 onPC
- What are...
- System Colors
- Command History
- Executor
- Values
- Background
- Programmer
- Groups
- Presets
- Tracking
- Cues
- Executors
- Chasers
- Effects
- Preview and Blind
- Network
- IPv6
- DMX Tester
- System Colors
- How to...
- Turn the console on and off
- Update the console
- Add, patch, change, and delete fixtures
- Save and load your show
- Use the command line
- Use Encoders in the onPC
- Work with groups
- Work with presets
- Work with cues
- Work with chasers
- Work with effects
- Connect nodes, wings, 3D and onPC
- Use external input triggers
- Use MIDI and MIDI Show Control (MSC)
- Use the external screen
- Use web remote
- Reset the console
- Keys
- Align
- At
- Backup
- Blind
- B.O.
- Clear
- Copy
- Cue
- Delete
- DMX
- [dot]
- Down
- Edit
- Effect
- [Encoder]
- Esc
- Exec (Executor)
- [Exec Flash]
- [Exec Go]
- Fix
- Fixture
- Flash
- Full
- Go-
- Go- (Large)
- Go+
- Go+ (Large)
- [GoFastBack] <<<
- [GoFastForward] >>>
- Goto
- Group
- Help
- Highlt (Highlight)
- Label
- If
- MA
- Macro
- Magic
- [Minus] -
- Move
- Next
- [Numeric keys]
- Off
- On
- Oops
- Page
- Page+
- Page-
- Pause
- Pause (Large)
- Please
- [Plus] +
- Preset
- Prev (Previous)
- Prvw (Preview)
- Select
- Set
- Setup
- Speed
- Store
- Thru
- Time
- Toggle
- Tools
- Up
- Update
- View [Eye]
- Views & Windows
- Control Elements
- Command Line
- Encoder Bar
- Executor Bar
- Preset Type Bar
- Title Bar
- View Bar
- Icons
- Add New Fixtures
- Backup
- Beam Preset Type
- Calculator
- Calibrate Screens
- Change Functions of Executor
- Choose Clone Method
- Choose Copy Method
- Choose Delete Method
- Choose Store Method
- Choose Update Method
- Clock
- Color Preset Type
- Command Line
- Configure Slot
- Control Preset Type
- Cues
- Dimmer Preset Type
- DMX
- Edit Cue Number(s)
- Effects
- Empty Executor
- Enter Name for
- Executor Bar
- Executor Pool
- Fixtures
- Fixture Schedule Overview
- Focus Preset Type
- Gobo Preset Type
- Global Settings
- Groups
- Help
- Import Fixture Type
- Key Backlight
- Leaving Patch & Fixture Schedule...
- Load Show
- Macros Pool
- Magic Speeds
- MIDI Configuration
- MIDI Monitor
- MIDI Show Control
- Network Interface
- Network Protocols Configuration
- Network Setup
- New Show
- Off...
- Oops
- Page Pool
- Patch and Fixture Schedule
- Position Preset Type
- Presets Pools
- Remote Inputs Configuration
- Save Show As...
- Select DMX Address...
- Select DMX Ports
- Select Fixtures ID(s)
- Select Fixture Type...
- Select Function for Remote Inputs Configuration
- Select Function of Executor
- Select Language...
- Select Session Number
- Select Station...
- Select Trig
- Select Type
- Select View
- Select View for External Screen
- Select Wing...
- Session Collision
- Settings of Executor
- Setup
- Shapers Preset Type
- Software Update via USB
- Sound Input Configuration
- Status and Messages
- System Clock
- System Information
- Time defaults
- Timecode Configuration
- Tools
- Video Preset Type
- Virtual Playbacks
- Window Settings
- Wings
- Wings & Nodes Diagnosis
- Control Elements
- Commands
- >>> [GoFastForward]
- <<< [GoFastBack]
- - [Minus]
- + [Plus]
- Assign
- At
- Black
- Blind
- Call
- Clone
- Copy
- Cue
- Default
- Delay
- Delete
- Dmx
- DmxUniverse
- Edit
- Effect
- Executor
- Fade
- Fix
- Fixture
- Flash
- Full
- FullHighlight
- Go
- GoBack
- Goto
- Group
- Help
- If
- IfOutput
- Invert
- Label
- Learn
- Macro
- MidiNote
- Move
- Off
- On
- OutDelay
- OutFade
- Page
- Park
- Pause
- Preset
- PresetType
- Preview
- Rate
- Record
- Release
- Remove
- Replace
- Select
- Selection
- SetIP
- SnapPercent
- Solo
- Stomp
- Store
- StoreLook
- SyncEffects
- Temp
- Thru
- Toggle
- Top
- Unpark
- Update
- View [Eye]
- Zero
- Hints for Operating
- Error Handling
- CrashLogCopy
- CrashLogDelete
- CrashLogList
- Error Messages
- Glossary
- dot2 Quick Start Guide
- dot2 3D
- dot2 Release Notes
New help version
The help version you selected belongs to an older software version. You may want to view the latest help version.
Presets Pools View
Table of contents of this topic
To go to the Presets Pools View on screen 1: Press Preset on the console.
To go to the Presets Pools View on screen 2: Tap Presets on the view bar.
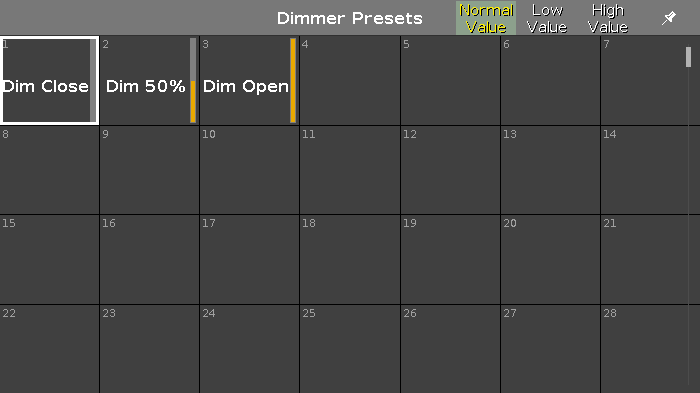
In this view you see the preset pools, depending on the selected preset type in the preset type bar.
There is a presets pool for each preset type available.
To go to the Dimmer Presets Pools View, select Dimmer in the preset type bar.
The title bar displays in which preset view you are.
Pin the current view and deactivate the dynamic view mode with a tap on the pin  in the title bar.
The preset pool view is not following the selected preset type in the preset type bar anymore.
You can store 999 preset objects in each preset pool.
To scroll in the presets pool view, slide the vertical scroll bar or slide up and down in the view.
If you store a new object, the console will ask you to label it.
To edit a stored preset object with the screen, press and hold the preset object tile.
To edit a stored preset object with the keys, press Edit and then tap the object which you like to edit.
To move an object: Press Move, tap the object which should move and then tap in an empty field where the object should go.
To copy an object: Press Copy, tap the object which should be copied and then tap in an empty field where the object copy should go to.
A copied object get a consecutively number after the object name, to see the difference.
For more information about Presets, refer to What are Presets? and How to work with Presets?
Preset Pool Objects
The last selected preset pool objects has a white frame around the object tile.
A preset without a function is displayed with a gray font.
Example: The fixtures used in this preset are removed from the Patch & Fixture Schedule.
Every preset pool object has a number in the upper left corner. This is the object number.
Example Preset 3.1 = Preset Pool 3. Gobo, Object 1.
Here are examples of a few preset pool objects.
Effects in Presets
A stored effect in a preset is indicated by a purple marker.

You can store either effects values or normal values in one preset pool object except position presets. In position preset pool objects, you can store effect values and normal values in one preset pool object.
To edit an effect stored in preset, use the Update function or the Edit function. Refer to Update key, Update command, and Edit key.
A position preset with an effect can only be end by using the Stomp function or Off function. Refer to Stomp command and Off command. All other effect presets ends by choosing another preset object including only normal values.
You can also store the Stomp function as a preset in the preset pool. For more information, see how to work with presets.
Example Dimmer Preset

This is the dimmer preset 1.13 (1 = Dimmer Preset Pool, 13 = Object 13).
The stored dimmer value is displayed in %.
Rightmost of the tile is the orange dimmer bar for a graphical view.
Example Position Preset

This is the position preset 2.1 (2 = Position Preset Pool, 1 = Object 1).
The position preset displays the labeled name.
Example Gobo Preset

This is the gobo preset 3.6 (3 = Gobo Preset Pool, 6 = Object 6).
The gobo and the labeled name are displayed.
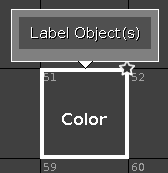
Example Color Preset


This is the color preset 4.22 (4 = Color Preset Pool, Object = Tile 22).
A color preset from a color wheel is displayed as circle.
A color preset from a mix color is displayed as a quadrate.
A combined color preset from color wheel and mix color displays
- in the big circle the actual color output
- in the small circle the color from the color wheel
- in the frame of the quadrate the color from the mix color.
The color and the labeled name are displayed.
Example Preset Markers
Preset markers indicate presets that are fully or partly applicable to a current selection.
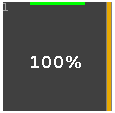
- The green marker indicates that all of the fixtures that are selected can be applied to the preset.
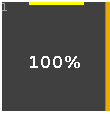
The yellow marker indicates that only a number of the fixtures selected are applied to the preset.
All Presets Pool
Additional to the presets pools for the several preset types, there is an All presets pool.
To go to the All Presets Pool, tap All in the preset type bar or press and hold  + 0.
+ 0.
In the All Presets Pool, you can store preset objects with values above all preset types.
Example All Presets

Let´s assume, you will store a preset object for all Alpha Spot QWO fixtures with a gobo, a color and a focus.
- Select the Alpha Spot QWO fixtures in the fixture view.
- Select the gobo, color, and the focus.
- Press Store, tap All in the preset type bar and tap on an empty preset type tile.
The preset object with all the information is stored in the presets pool all.