

- dot2 User Manual
- dot2 Quick Start Guide
- dot2 3D
- Install and Uninstall
- System Requirements
- Installation
- Uninstall dot2 3D
- First Steps
- Hardware Connection
- Create session and connect 3D
- Data Management
- Master/Slave
- Coordinate system
- Program Surface
- Menu Bar
- File Menu
- File - Settings
- Edit
- Functions
- Tools
- View
- Help
- File Menu
- Tool Bar
- Main Windows
- Stage View
- Mouse + Keyboard Actions
- Arrangement of Objects (Align Objects)
- Duplicate (copy 3D Objects)
- 3D Objects
- Assets (Information Window)
- Properties
- Media Database
- Materials
- Video Player
- Moving Paths
- Sessions
- Status Bar
- Window Layout
- Menu Bar
- Fixture Types
- 3D Modeling and Import
- 3D Models Principles
- Parameters
- Axes
- Rotation Axes
- Linear Axes
- Beam of Light
- Automated Import
- Assigning of Models to Fixture Types
- Checklist for 3D Modeling
- Creation of a 3D Model
- Keyboard Shortcuts
- dot2 3D FAQ
- Install and Uninstall
- dot2 Release Notes
Version 1.9
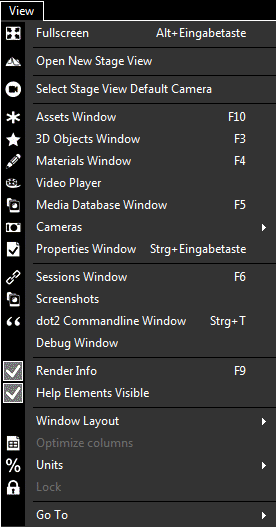
View
The view menu in detail.
| Fullscreen | Opens the stage view in full screen. |
| . | . |
| Open New Stage View | Opens a new Stage view. Refer to, Stage View. |
| . | . |
| Assets Window | Opens the Assets window. Refer to, Assets Window. |
| . | . |
| 3D Objects Window | Opens the 3D Objects view. Refer to, 3D Objects View. |
| . | . |
| Materials Window | Opens the Materials window. Refer to, Materials Window. |
| . | . |
| Video Player | Opens the Video Player view. You can map video files instead of textures on surfaces and control this files via the video player window. |
| . | . |
| Media Database Window | Opens the Media Database window. Refer to, Media Database Window. |
| . | . |
| Cameras | The following options are available. |
| . | The cameras/views are added in the stage view and gives you a view on the stage from the added camera/view position. |
| - Add Front Camera | |
| - Add Front/Left Camera | |
| - Add Left Camera | |
| - Add Back/Left Camera | |
| . | - Add Back Camera |
| . | - Add Back/Right Camera |
| . | - Add Right Camera |
| . | - Add Front/Right Camera |
| . | - Add Top Camera |
| . | - Add Front View (2D) |
| . | - Add Side View (2D) |
| . | - Add Top View (2D) |
| . | - Add at Current Position. Adds a further camera at the current positon. Double check in the Assets Window. |
| . | - Use Selected. Uses the selected camera from the Assets Window. |
| - Cameras Visible. Displays the cameras in the stage view as direction arrows. | |
| . | - Camera Spanning. Spans the cameras in stage view. This makes sense if you use more than one screen in the fullscreen mode. |
| - Cameras Window. Opens the Cameras Window. | |
| . | . |
| Properties Window | Opens the Properties windows. Refer to, Properties Window. |
| . | . |
| Sessions Window | Opens the Sessions window. Refer to, Create a Session. |
| . | . |
| Screenshots | Opens the Screenshots window. |
| . | . |
| Commandline Window | Opens the Commandline Window. |
| . | . |
| Debug Window | Opens the Debug 3D Window (system monitor). |
| . | . |
| Render Info | Turns the render information in the stage view on or off. |
| . | . |
| Help Elements Visible | Turns the X,Y,Z axis in the stage view on or off. |
| . | . |
| Window Layout | The following options are available: Refer to, Window Layout Arrangement. |
| - Load Window Layout. Opens the windows explorer to load a saved window layout. | |
| - Save Window Layout. Opens the windows explorer to save the current window layout. | |
| - Reset Window Layout. Resets the window layout to default. | |
| . | . |
| Optimize Columns | Sets the columns in the 3D Objects grid to optimal size. |
| . | . |
| Units | The following options are available: This affects the Properties Window. |
| - Size as Dimension. Sizes are displayed in physical units, e.g. meter and inch. | |
| - Size as Scaling Factor. Sizes in the are scaled in % of the original size. | |
| . | . |
| Lock | Locks the Properties Window. |
| . | . |
| Go To | The following options are available: |
| - Previous Selection. Selects the previous selection. | |
| - Next Selection. Selects the next selection. |