

- grandMA2 User Manual
- grandMA2 Quick Start Guide
- MA 3D
- MA VPU
- Introduction
- Help from MA technical support
- System requirements
- For your Safety
- Functions and Features
- Transition from grandMA video to MA VPU
- Teaser Mode
- Comparison VPU plus / VPU basic / VPU light
- Main Features
- Installation and Maintenance
- Startup
- Software update
- Service Packs
- Update of Fixture Types
- Backup
- Handling backups with the VPU
- Start Acronis on VPUs with serial Numbers up to # 86 on
- Start Acronis on VPUs with serial Numbers from # 87
- Restoring an image with Acronis
- Storing an image with Acronis
- Backup the VPU content after shipment
- Access VPU via Network
- Version of grandMA desk or grandMA onPC (off-line)
- IP Addresses
- IP Address of the PC
- Art-Net IP Address
- EDID Manager
- CITP / MSEX Protocol
- Installation and Maintenance
- Communication with the grandMA Desk Series
- Connection with the grandMA desk
- Connection with the grandMA onPC (off-line) software
- Connection States
- Data Management
- Master slave
- Principle function diagram
- Layer Properties
- Layer Reference
- Virtual Outputs
- Virtual Output: Configuration of a TripleHead2Go Digital Port
- Predefined Constellation
- Several MA VPU applications in one grandMA show
- Quickstart with grandMA2
- Program surface
- Internal Touch-Screen VPU plus
- Internal Screen VPU light
- Menu Bar
- File...
- View...
- Render...
- Help...
- Toolbar
- Status Bar
- Preview
- Multi Preview
- Content Editor
- Content: Image Pool (I-Pool)
- Content: Text Ticker
- Content: Eff1 Type...Eff4 Type
- Content: 3D Objects
- Content: Mask
- Warper
- Warper Fullscreen View
- Warper Basic Operation
- Warping
- File Browser
- Features Attributes and Functions
- Order of Effect Execution
- Softedging
- Keystoning
- Pixel Mapper
- VPU - Pixel Mapper Graphical View
- Pixel Mapper Toolbar
- Pixel Mapper Editor
- VPU - Pixel Mapper Grid View
- Console - VPU Pixel Mapper View
- VPU - Pixel Mapper Graphical View
- Creation of customized 3D Objects
- Content Specifications
- Rovi Total CodeStudio for converting your content into MPEG2
- Hap Content Converter
- Warnings
- Keyboard Shortcuts
- Supplement MA Lighting
- Intended use
- Data
- Symbols and warning labels
- LIMITATIONS
- Transport
- General Safety Instructions
- IMPORTANT SAFETY INSTRUCTIONS
- Electric shock warning on the rear of the grandMA
- Safety and Environment
- Quickstart Connect VPU plus
- Quickstart Connect VPU light
- Switching the apparatus On/Off
- Maintenance
- Conformity
- Introduction
- Release Notes
New help version
The help version you selected belongs to an older software version. You may want to view the latest help version.
Content: Image Pool (I-Pool)
MA VPU comes with a sample library containing images, gobos and video clips. This content is preinstalled on the VPUs and can be ordered from MA Lighting.
Similar to the magazine of a slide projector such a folder behaves like a slide magazine. Up to 255 folders can be accessed directly from the desk. The different images and videos of a folder correspond to the „Channel Sets" of the desk and can be accessed from there. To insert images and videos click with the right mouse button somewhere in the ‚I-Pool Folder" or ‚Channel Functions' field and navigate in the upcoming dialog to the folder where the images and videos are located. It is not recommended to use an external drive for the content, we recommend to copy the files to the content drive D:. After the selection of the folder and confirming with „OK" it will take a while until the images are shown because MA VPU has to build a so-called thumbnail (little image) for all items. Therefore each file has to be opened and searched for a usable picture.
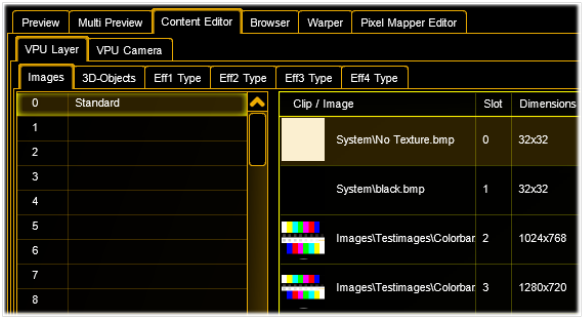 |
Items can be edited, changed or deleted via the context menu of the right mouse button. Data of the items like size, framerate and length are shown in a grid. If an item is selected its preview is shown in the preview window at the lower left side of the screen. Multiple items can be selected if you hold down the 'Ctrl’ key while selecting items or use the mouse as a lasso. Hotkeys, 'Ctrl’ + x,c,v (Cut, Copy, Paste) and 'delete’ are allowed |
 |
Video clips do have a video thumbnail showing the first frame of this clip. If the clip contains sound this is indicated by a yellow speaker icon. If the clip is selected you can see a preview in the left corner below. |
 |
If a clip does not fulfill the content specifications this will be indicated by a red marked text. If the content fullfills the specifications of the Hap Converter, you can use the Hap Converter to convert the content to a valid format which can be played back. |
 |
Sound only files like mp3 or wav are displayed with a speaker icon. |
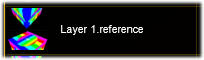 |
Layer Reference: This allows any Layer to take the output of another layer as input. This saves performance because a video must not be decoded twice. |
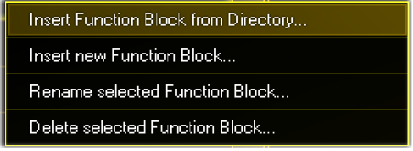 |
To assign a new folder to a 'Channel Function' click with the left mouse button into a line. |
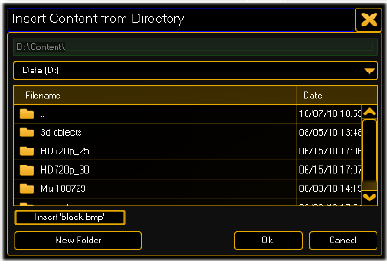 |
A context dialog appears. After selecting the entry a browser window appears where you can navigate to the folder containing the videos. |
 |
After the selection of the folder its name is taken as a name for the ‚Channel Function' as shown in this example ‚Test Images'. You can change the name via the context menu with the right mouse button |
 |
Insert Dynamic Test Images This function generates 10 different test images related to the connected outputs ratio and inserts them into the next free slots. |
 |
These images can be used to adjust the output geometry and colors. Note: To get the 1:1 pixel correct display of the test pattern make sure to use the @Native Object only! |
| Export and Import Function Blocks | |
 |
With this function it is easy to change Fixture Types of old shows without losing content information or manually inserting it again.
1. Export Function Blocks
2. Exchange Fixture Type
3. Import Function Block again
4. The show can go on!