

- grandMA2 User Manual
- grandMA3 Mode2
- grandMA2 Quick Start Guide
- grandMA2 Quick Manual onPC solutions
- MA 3D
- Help from MA technical support
- Symbols used
- Introduction
- Install and Uninstall
- System Requirements
- Installation
- Uninstall MA 3D
- First Steps
- Hardware connection
- Start MA 3D
- Create a Session
- Data Management
- Master/Slave
- Coordinate system
- Program Surface
- Menu Bar
- Menu Bar - File Menu
- Settings
- Edit
- Functions
- Tools
- View
- Help
- Tool Bar
- Main Windows
- Stage View
- Mouse + Keyboard Actions
- Arrangement of Objects (Align Objects)
- Duplicate (copy 3D Objects)
- 3D Objects
- Assets (Information Window)
- Properties
- Media Database
- Materials
- Video Player
- Moving Paths
- Sessions
- Status Bar
- Windows Layout
- Menu Bar
- Fixture Types
- 3D Modeling and Import
- Workflow
- 3D Modeling Principles
- Creation of a 3D Model
- Creation of a 3D Fixture Model
- Import 3D Model to MA 3D
- Assigning of 3D Models to Fixture Types
- Checklist for 3D Modeling
- Automated import
- Parameters
- Axes
- Rotation Axes
- Linear Axes
- Beam of Light (Cone)
- Keyboard Shortcuts
- MA 3D FAQ
- MA VPU
- Release Notes
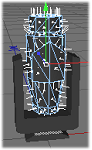
Creation of a 3D Fixture Model
This example describes the construction of a Head Mover fixture on the example of a Vari-Lite VL-1000.
Whenever creating a new object triangulate it. If you do not triangulate the object, the MA3D import tool ignores the object.
You can triangulate an object in Cinema 4D in Functions → Make Editable and then Functions → Triangulate.
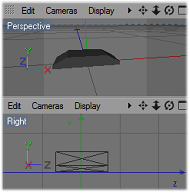
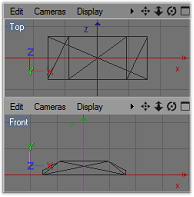
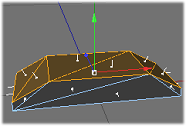
Create the Base of the 3D Model
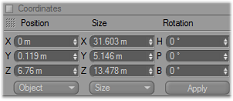
Dimensions
The size of the model can be rescaled using the import tool of MA 3D.
It is possible to use other scaling factors while creating the model.
In this case a scaling of 100 is used (1m = 1cm).
The xml description file then contains the following line:
<Scale>0.01</Scale>
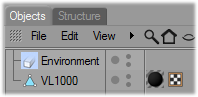
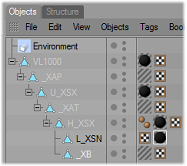
The housing of the base is the root of the object tree and uses the name of the model name 'VL1000'. It consists of a low number of polygons joined to a flattened box. To reduce the number of polygons, use the point collapse plugin in Cinema 4D.
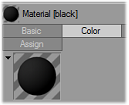
Colors and Textures
Colors and textures are defined by the material. Add the UVW tag for texture mapping and a material by dragging the material to the object.
MA 3D uses the assigned texture. Therefore, the texture file (max. 8 characters) must be placed in the same folder as the .3ds file.
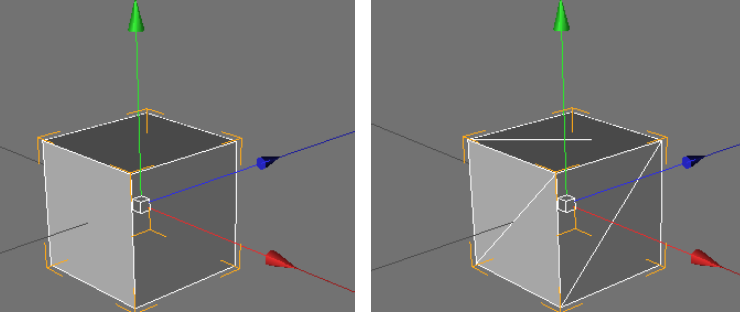
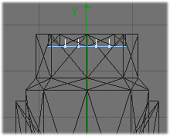
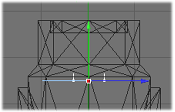
Normals
Mark the visibility of the areas. In Cinema 4D they are marked with white lines.
To make both sides visible, duplicate the object and reverse the normals of the duplicate.
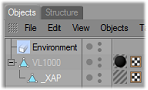
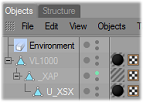
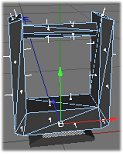
Anchor for the Pan Axis [_XAP]
To provide the pan movement in MA 3D, the name of the object has to begin with an _X.
The _X marks a parameter block. All child objects follow the pan movement.
The following sub parameters AP marks the axis A and defines the pan movement P. The name of the pan anchor is _XAP.
The material is transparent.

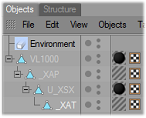
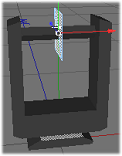
Yoke for the Pan Axis [U_XSX]
The yoke is a child object of the anchor of the pan axis.
It has the same UVW tag and material as the base.
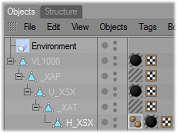
Anchor for the Tilt Axis [_XAT]
To provide the tilt movement, the object is named _XAT. All child objects follow the tilt movement.
The material is transparent.
Lamp Head [H_XSX]
The lamp head is a child object of the anchor of the tilt axis.
The name is H_XSX this means:
H - is ignored
_X - Parameter
SX - Sunshade type excludes the own beam
It has the same UVW tag and material as the base.
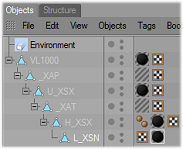
Lens [L_XSN]
The lens is a child object of the lamp head.
The name is L_XSN this means:
L - is ignored
_X - Parameter
SN - Sunshade type is None. Neither is the beam affected nor are the gobos projected on the object.
It has the same UVW tag and material as the base housing.
Origin of the Beam [_XB]
The origin of the beam is a child object of the lamp head.
The name is ‘_XB’ this means:
_X - Parameter
B - Origin of the Beam cone
The material is transparent.
After you have created the model, export it into 3D Studio format (.3ds).