

- grandMA2
- grandMA3 Mode2
- grandMA2 Quick Start Guide
- Welcome
- 01 Create a New Show
- 02 Patch Dimmers
- 03 Use Screens and Windows
- 04 Control Dimmers or Channels
- 05 Working with Groups
- 06 Store the First Cue
- 07 Create More Cues
- 08 Edit a Sequence
- 09 Add Moving Lights
- 10 Fixture Sheet
- 11 Control Fixtures
- 12 Preset Pool
- 13 Making Presets
- 14 A Second Sequence
- grandMA2 Quick Manual onPC solutions
- MA 3D
- MA VPU
- Release Notes
New help version
The help version you selected belongs to an older software version. You may want to view the latest help version.
Using the screens and windows
Now is a good time to have a closer look at working with screens and windows.
Command Line Feedback window
Often it can be an advantage to see how the console reacts to your input. This is done on the Command Line Feedback window.
We are going to create this window at the bottom of screen 2 (the 15,4" touch screen on the right side).
Tap anywhere in the upper left corner on the empty screen. This gives you the "Create Basic Window" pop-up. Here you need to tap the System tab. Here you will find a Command Line button. Tap it.
Now you have created a Command Line Feedback window.
It continually gives you a lot of information. Do not be confused about all the information. We will go through it, when needed.
You can resize the window by pressing and holding the area in the lower right side of the window (where there is are a lot of yellow dots) and then move your finger/mouse into the window. Release the screen when you are happy with the size.
Make the window smaller.
When the window does not take up the entire screen, then the window can be moved by pressing and holding the title bar of the window (where the "Command Line Feedback" text is) and move your finger/mouse around the screen.
Move the window to the bottom of the screen.
Channel Sheet
To view your 40 channels you will need a Channel Sheet window.
Press the upper left corner on screen 2. Then select the Sheets tab in the "Create Basic Window" and then the Channel button.
You have now created a Channel Sheet. Here you can see your channels and the values they have.
There are some extra special channels in the sheet. They are called "FT 1.1.1" and "FT 2.1.1". They are automatically created "Fixture Type" channels. They are created by the software and you should not worry about them. The details about them are outside the scope of this guide.
Your screen should now look something like this (It is scaled down in size - click it to open the bigger version - online manual only):

Storing Views
In the right side of screen 2 you have some positions where you can store your window arrangement, the stored arrangement is called a "View" and the buttons on the right side screen of screen number 2 to screen number 6 are called "View Buttons".
You can store your view on any of the view buttons.
We are going to store our view on the top view button on screen 2.
Press the Store key followed by the V1 key (hard key next to screen 2). On the onPC you do not have the 'V1' key so just tap the view button on the screen.
This gives you a pop-up. It asks which screens you want to store. Without changing anything tap the Please button.
You have now created a view called "view 1". Let us give it a better name.
Press the Assign key twice followed by the V1 - or just the view button. This gives you a new input pop-up. Here you write: Channel followed by a 'Please'/enter.
You can see in your Command Line Feedback window writes this:
This tells you that you have given your view a new label and that it is regarding screen number 2.
The view button should look like this:
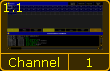
This is a thumbnail of the stored view.
It does not matter if you press the V1 key or the view button on the screen. The result is the same.
On the next page we are going to learn about controlling the values of the channels.