

- MA Network Switch
- Introduction
- Intended Use
- Dangers caused by Electric Current
- General Safety Instructions
- System Requirements
- SFP Transceiver Compatibility
- Device Overview
- Front Panel
- Rear Panel
- LED Indicators
- Factory Defaults
- First Steps
- Unpack the Device
- Install Mini-GBIC (SFP)
- Installation in a Rack
- Connect the Hardware
- Set the IP Address on the PC
- Access the Web Interface
- Display Navigation
- Groups View
- Name View
- Workload View
- LAG View
- Reset View
- Ports / Groups
- Change Port Description
- Assign Groups to Ports
- Edit LAGs
- Edit RSTP
- Edit Speed Setting
- Change Group Name
- Edit IGMP Snooping
- Edit IGMP Querier
- Edit Unknown Flooding
- Change VLAN ID
- Presets / Filters
- Assign Presets to Ports
- Apply Filters to Ports
- Create New Presets
- Update Presets
- Create New Filter
- View Filters
- Delete Presets
- Delete Filter
- General Settings
- Change Name
- Change ID
- Change DHCP Client
- Change IP Address
- Change Subnet Mask
- Change Default Gateway
- Change SNMP Status
- Change Password
- Update Firmware
- Fallback to Backup Firmware
- Get Switch Configuration
- Edit Port Mirroring
- Upload Switch Configuration
- Reset Settings
- Web Interface and grandMA2
- Specifications
- Support
- Glossary
- Introduction
Hint:
New help version
The help version you selected belongs to an older software version. You may want to view the latest help version.
New help version
The help version you selected belongs to an older software version. You may want to view the latest help version.
Version 3.7
Upload Switch Configuration
You can upload a previous exported switch configuration, or parts of switch configuration.
This is useful if you have to configure several switches with the same configuration.
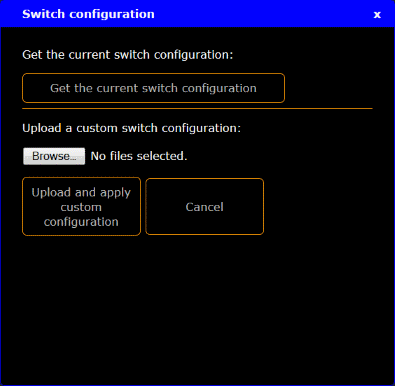
Figure 1: Switch Configuration
Important:
The configuration file uploaded via the onPC does not affect the IP address. The configuration file uploaded via the web interface, however, does affect the IP address.
The configuration file uploaded via the onPC does not affect the IP address. The configuration file uploaded via the web interface, however, does affect the IP address.
Important:
The configuration file has to be written in a JSON (JavaScript Object Notation) data format. If it is not in a JSON data format, the switch can not read the configuration file.
The configuration file has to be written in a JSON (JavaScript Object Notation) data format. If it is not in a JSON data format, the switch can not read the configuration file.
Hint:
If you are not sure how to write the configuration file, get the current switch configuration and modify this file.
If you are not sure how to write the configuration file, get the current switch configuration and modify this file.
Important:
If you upload only parts of switch configuration, e.g. only the filters, it is necessary that the entire filters configuration part is included in the configuration file. If parts are missing in the configuration file, the configuration upload does not work.
If you upload only parts of switch configuration, e.g. only the filters, it is necessary that the entire filters configuration part is included in the configuration file. If parts are missing in the configuration file, the configuration upload does not work.
Requirement: Connection to the web interface.
- Click Tools / Edit General Settings.
- Click Switch configuration.
- Click Browse.
The explorer opens. - Select the switch configuration for upload.
- Click Upload and apply custom configuration.
A warning asks if you really want to apply the configuration. - Click OK.
The switch configuration is uploading. The update screen opens.
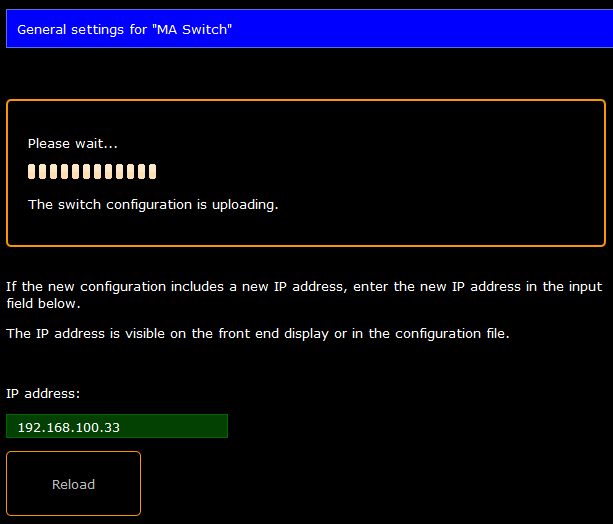
Figure 2: Update Screen
The update process can take about 60 seconds. - Follow the screen instructions and click Reload.
The switch configuration is uploaded and saved in the startup configuration.