

- dot2
- New in the Manual
- Introduction
- Intended Use
- System Requirements dot2 onPC
- Installation of dot2 onPC
- Getting Started Guide
- 1 - Introduction
- 2 - Physical setup and layout
- 3 - Create a new empty show
- 4 - Adding and patching dimmers
- 5 - Controlling dimmers
- 6 - Fixture view
- 7 - The programmer
- 8 - Making and working with groups
- 9 - Store a cue and play it back
- 10 - Making more cues in the cue list
- 11 - Adding LED fixtures
- 12 - Working with colors
- 13 - Creating presets
- 14 - External screen
- 15 - Adding moving lights
- 16 - Controlling moving lights
- 17 - Making more groups and Presets
- 18 - More about cues and playback
- 19 - A look at Blind, Preview and DMX tester
- 20 - Fun with macros
- 21 - Building chasers
- 22 - Building dynamic effects
- 23 - Connect to onPC, 3D, Wings and Nodes
- 24 - Happy programming
- What are...
- System Colors
- Command History
- Executor
- Values
- Programmer
- Groups
- Presets
- Tracking
- Cues
- Executors
- Chasers
- Effects
- Preview and Blind
- Network
- IPv6
- DMX Tester
- System Colors
- How to...
- Turn the console on and off
- Update the console
- Add, patch, change, and delete fixtures
- Save and load your show
- Use the command line
- Use Encoders in the onPC
- Work with groups
- Work with presets
- Work with cues
- Work with chasers
- Work with effects
- Connect nodes, wings, 3D and onPC
- Use external input triggers
- Use MIDI and MIDI Show Control (MSC)
- Use the external screen
- Reset the console
- Keys
- Align
- At
- Backup
- Blind
- B.O.
- Clear
- Copy
- Cue
- Delete
- DMX
- [dot]
- Down
- Edit
- Effect
- [Encoder]
- Esc
- Exec (Executor)
- [Exec Flash]
- [Exec Go]
- Fix
- Fixture
- Flash
- Full
- Go-
- Go- (Large)
- Go+
- Go+ (Large)
- [GoFastBack] <<<
- [GoFastForward] >>>
- Goto
- Group
- Help
- Highlt (Highlight)
- Label
- If
- MA
- Macro
- Magic
- [Minus] -
- Move
- Next
- [Numeric keys]
- Off
- On
- Oops
- Page
- Page+
- Page-
- Pause
- Pause (Large)
- Please
- [Plus] +
- Preset
- Prev (Previous)
- Prvw (Preview)
- Select
- Set
- Setup
- Speed
- Store
- Thru
- Time
- Toggle
- Tools
- Up
- Update
- View [Eye]
- Views & Windows
- Control Elements
- Command Line
- Encoder Bar
- Executor Bar
- Preset Type Bar
- Title Bar
- View Bar
- Icons
- Add New Fixtures
- Backup
- Beam Preset Type
- Calculator
- Calibrate Screens
- Change Functions of Executor
- Choose Clone Method
- Choose Copy Method
- Choose Delete Method
- Choose Store Method
- Choose Update Method
- Color Preset Type
- Command Line
- Configure Slot
- Control Preset Type
- Cues
- Dimmer Preset Type
- DMX
- Edit Cue Number(s)
- Effects
- Empty Executor
- Enter Name for
- Executor Bar
- Executor Pool
- Fixtures
- Fixture Schedule Overview
- Focus Preset Type
- Gobo Preset Type
- Global Settings
- Groups
- Help
- Import Fixture Type
- Key Backlight
- Leaving Patch & Fixture Schedule...
- Load Show
- Macros Pool
- Magic Speed
- MIDI Configuration
- MIDI Monitor
- MIDI Show Control
- Network Interface
- Network Protocols Configuration
- Network Setup
- New Show
- Off...
- Oops
- Page Pool
- Patch and Fixture Schedule
- Position Preset Type
- Presets Pools
- Remote Inputs Configuration
- Save Show As...
- Select DMX Address...
- Select DMX Ports
- Select Fixtures ID(s)
- Select Fixture Type...
- Select Function for Remote Inputs Configuration
- Select Function of Executor
- Select Language...
- Select Session Number
- Select Station...
- Select Trig
- Select Type
- Select View
- Select View for External Screen
- Select Wing...
- Session Collision
- Settings of Executor
- Setup
- Shapers Preset Type
- Software Update via USB
- Sound Input Configuration
- Status and Messages
- System Clock
- System Information
- Time defaults
- Timecode Configuration
- Tools
- Video Preset Type
- Virtual Playbacks
- Window Settings
- Wings
- Wings & Nodes Diagnosis
- Control Elements
- Commands
- >>> [GoFastForward]
- <<< [GoFastBack]
- - [Minus]
- + [Plus]
- Assign
- At
- Black
- Blind
- Call
- Clone
- Copy
- Cue
- Default
- Delay
- Delete
- Dmx
- DmxUniverse
- Edit
- Effect
- Executor
- Fade
- Fix
- Fixture
- Flash
- Full
- FullHighlight
- Go
- GoBack
- Goto
- Group
- Help
- If
- IfOutput
- Invert
- Label
- Learn
- Macro
- MidiNote
- Move
- Off
- On
- OutDelay
- OutFade
- Page
- Park
- Pause
- Preset
- PresetType
- Preview
- Rate
- Record
- Remove
- Replace
- Select
- Selection
- SetIP
- SnapPercent
- Stomp
- Store
- StoreLook
- SyncEffects
- Temp
- Thru
- Toggle
- Top
- Unpark
- Update
- View [Eye]
- Zero
- Hints for Operating
- Release Notes 1.2
- Error Handling
- CrashLogCopy
- CrashLogDelete
- CrashLogList
- Error Messages
- Glossary
- dot2 3D
New help version
The help version you selected belongs to an older software version. You may want to view the latest help version.
Getting Started Guide - Adding LED fixtures
Now we are going to add some more fixtures to our patch.
We got four Chauvet COLORdash Par-Hex 7 wash fixtures. Our new plot looks like this:
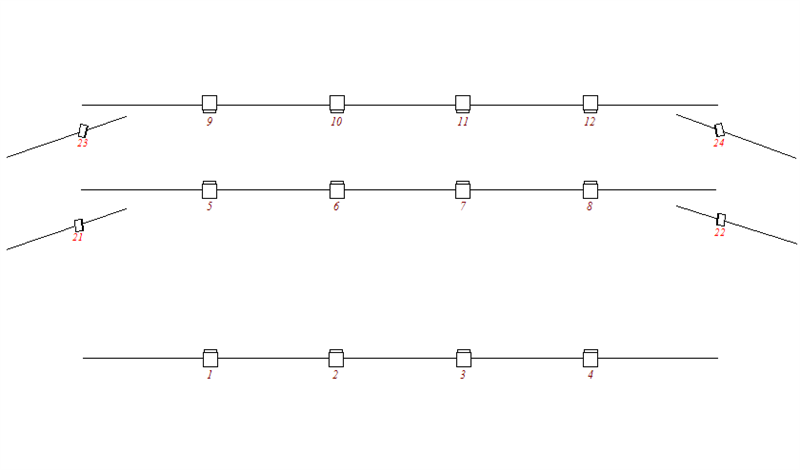
They are mounted on vertical poles on each side of the stage.
We need to go back into the setup and add these four fixtures. Press Setup and select Patch & Fixture Schedule.
On the right side you'll find a button called Add New Fixtures - That sounds like something we need.
When you press this, you'll get the Add New Fixtures window.
In the type input field we still have the Dimmer selected. We have all the dimmers we need, so we need to get a new fixture type. Press the button next to this area where it says Select Other.... If this is the first time this is done, then the console needs to update the fixture library - That might take a few seconds.
When it's done (or if you didn't need to wait for it) you can press the green input field and type dash 7.
The search will display every possible hit in the fixture library. The easy way to select the right fixture is using the encoders.
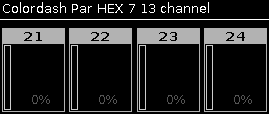
We need the one from Chauvet called ColordashPar HEX 7. This fixture have several possible modes. We need to select the mode called "13 channel".
Sometimes when you add fixtures they'll only have one mode available. Then the mode will often be called "00". This is the case for our dimmers - remember they have a 00 at the end.
Ok, back on track. When you've found the Hex 7's, the bottom of your screen should looks like this:

Then we can press the OK in the upper right corner.
Now our fixture type is the correct one. Change the quantity to 4 and the fixture ID to 21.
We also need to change the address for the first fixture. We want to patch them from the first address on the second DMX universe and we want then to have 20 addresses between them (they only use 13 channels).
Press the rightmost encoder.
This opens the Select DMX Address window. Here you can see what is patched to the 8 available universes.
Again we can use the encoders to change the patch address. The left encoder selects the universe and the rightmost encoder selects the address. The middle right encoder is called "Patch Offset" - this can be used to automatically add more channels between fixtures. We need universe 2, address 1 and we want to have 20 channels between each fixtures start address, so we need to set the Patch Offset to 20. When you have that you can press the OK in the upper right corner, this takes us out of the Select DMX Address window.
Again we can press the OK in the upper right corner (to close the Add New Fixtures window). This takes us to the Fixture Setup - all is good here, press the Done in the upper right corner and select Apply All Changes.
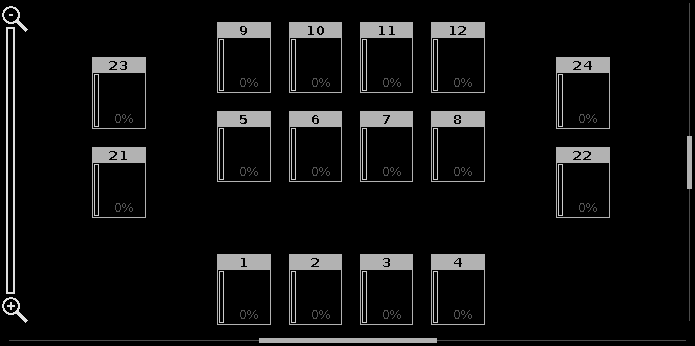
That was it. Now you can see in the Fixture Symbol View that we have 4 new fixtures:
We should also add these fixtures to our Fixture Layout View number 1.
Select the fixtures using a fixture view and press Store followed by selection the number 1 Fixture Layout View and then tap inside the view. You are now presented with a pop-up asking how you want to store. Select Merge.
Now you can arrange the added fixtures in the view.
It could look like this:
In the next chapter we are going to have a look at controlling these new fixtures.