

- dot2 User Manual
- dot2 Quick Start Guide
- 1 - Introduction
- 2 - Physical setup and layout
- 3 - Create a new empty show
- 4 - Adding and patching dimmers
- 5 - Controlling dimmers
- 6 - Fixture view
- 7 - The programmer
- 8 - Making and working with groups
- 9 - Store a cue and play it back
- 10 - Making more cues in the cue list
- 11 - Adding LED fixtures
- 12 - Working with colors
- 13 - Creating presets
- 14 - External screen
- 15 - Adding moving lights
- 16 - Controlling moving lights
- 17 - Making more groups and Presets
- 18 - More about cues and playback
- 19 - A look at Blind, Preview and DMX tester
- 20 - Fun with macros
- 21 - Building chasers
- 22 - Building dynamic effects
- 23 - Connect to onPC, 3D, Wings and Nodes
- 24 - Happy programming
- dot2 3D
- dot2 Release Notes
New help version
The help version you selected belongs to an older software version. You may want to view the latest help version.
Getting Started Guide - Storing a cue and playback
Table of contents of this topic
Let's make a cue with something in it.
Clear your programmer. Then select fixtures 5 and 7. Put them at 40%.
Now press Store Please.
Now we have created cue number 1 on the main executor. Try to clear your programmer. If you look at a Fixture view, you can see that your fixtures don't output the 40%. You'll need to activate the cue and make sure the fader is up for the values to be outputted.
We stored the cue on the main executor so this it the one we need to play back the cue.
Have a look at this picture:
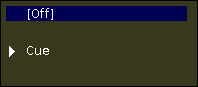
Here we can see what the console is doing on the main executor. It says the executor is currently off.
The Main executor have two faders. The left one is the master, the right one is used to manually cross fade between two cues. Moving this fader to the opposite position will fade between cues using the timing of your fader movement.
The dot2 don't have motorized faders. So there might be some inconsistencies regarding where the console software believe a fader should be and where it actually is. If this is the case then you'll see a graphic visualization of the faders with a red marker. The marker tells you where the physical fader is. The graphic fader shows where the software says the fader should be.
If you left physical fader (the Master) isn't at 100, please move it there and please make sure the Crossfade fader is at 0. We might still needs to activate the cue. We do this by pressing the big Go + key below the faders.
Then your mini executor view should look like this:
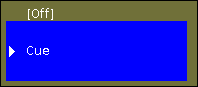
Notice the brighter color and the blue marking of the cue. This indicates that the executor is active and that the cue is active.
You should also be able to see the fixtures have 40% output on the Fixture view.
Try to move the Master fader up and down to see how this is related to the output of our channels.
Cues view
Let's have a look at the cue list. Press the Cue key. Now we can see the Cues view on screen 1. Each cue is represented by a horizontal row. The columns are different settings or information regarding the cues.
I don't want to go into a lot of details, but I will tell you what each column is. Some of it is obvious, but other things are bit more tricky.
- 'Number' is the cue number.
- 'Name' is the cue name.
- 'Protected' is a function to protect the cue from changes made in previous cues (tracking - we'll got to it).
- 'Trig' is the action that triggers the execution of the cue. The default trigger is "Go", but there are other possibilities and we are going to look at them later.
- 'Trig Time' is relevant when you use time triggers instead of Go.
- 'Fade' is the fade time for the cue.
- 'Out Fade' is used when you need a different fade time for the fixtures going down in dimmer value.
- 'Out Delay' is used when we want to delay the beginning of the fade for the fixtures going down in dimmer value.
- 'All Fade' is grayed out and can't be used.
- 'All Delay' is grayed out and can't be used.
- '[Preset type] Fade' - Each of the possible preset types have their own fade column. This is used to set a fade time for that specific preset type. The unavailable preset types are grayed out and cannot be changed. More about Preset types later. If the background of a cell is dark and the number is black, then it's not an active values and will not have any influence in how the cue is played back. White values are active and will influence the cue playback.
- '[Preset type] Delay' - Each of the possible preset types have their own delay column. This is used to set a delay time for that specific preset type. The unavailable preset types are grayed out and cannot be changed. More about Preset types later. If the background of a cell is dark and the number is black, then it's not an active values and will not have any influence in how the cue is played back. White values are active and will influence the cue playback.
- 'Cmd' is short for command. This is used when we need to trigger something else with the cue - we are going to explore that later.
- 'Snap Percent' is a special function used with complex fixtures that have things like gobo wheels. Some things are set to "snap" from the old position to the new, instead of fading from one to the other. Snap Percent is used to set the point in the cue fade time when the gobo wheel should change position. 0% is when the fade begins. 100% is when all the fade times are done.
- 'Info' displays the corresponding info related to a cue.
When we add more advanced fixtures to our show then the grayed out delay and fade column for each of the different preset types will be available.
Most of the elements can be changed using the Edit key. We can also use the rightmost encoder. Press it and keep it pressed while you rotate. When you have a blue background on the name you can release the encoder and then just to press it shortly - if you are using the dot2 onPC, then you can't do this, instead you can use the mouse and right click the cell.
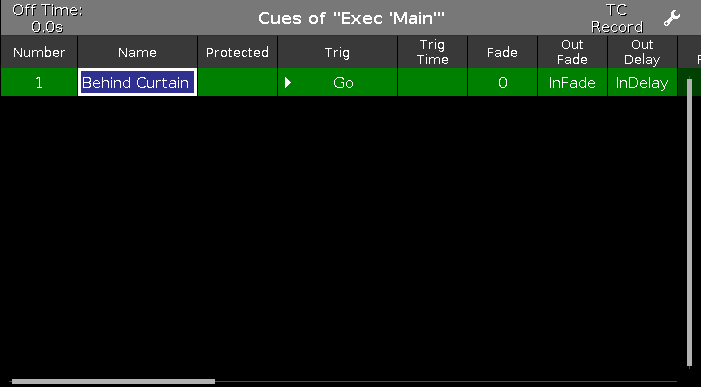
This gives us the Edit Name pop-up. Change the name to Behind Curtain. If you can't see the entire name or you just want to change the width of the columns you can do this by pressing on the black line between the column headlines and then while pressing, move your finger to change the width.
When you are done it should look something like this:
The Cues view can also be called on the other screens. On the right side of the other screens you find a button called Cues.
Let's make some more cues
Turn group two (All FOH) at full. Now press Store and then the  key associated with executor number 1 (if you forgot, then it's the one closest to the main executor). Again you might need to move the fader to match what the console does.
Let's have a look at the relationship between the executor and the programmer.
Clear you programmer and take both your executors down to zero. Make sure the main executor is off by pressing the Off key and then one of the keys associated with the main executor.
When you turn up executor 1 then fixtures 1 to 4 turns on. When you turn it down, then they turn off again.
Now put the fader at around 50. Then put group two at 80% in your programmer. Try to move the fader again. Now the fixtures stay at 80%. This is because the programmer have a higher priority than the executor.
Try to store you programmer on executor number 2. Now try to move executor number 2. This will change the values for the four fixtures. So when we store the content of the programmer somewhere it's transferred to the executor and don't have the high priority from the programmer - it's no longer "active" in the programmer.
Try to turn up executor number 2 to 100. That turns up the fixtures to 80%. Now turn executor number 1 to 0 and then up to 100. Now your fixtures fade from 80% to 100% This is because the executors work by a latest takes precedence (LTP) principle. That means that the fixtures will fade to the newest value being called. That's why they fade to the value from executor number 1. Take down executor 2 and keep up executor 1. Now the fixtures are still at 100%. Now turn up executor 2. Notice that the values now fade down to 80%. Because that's the latest value.
If you would like to see the cues on the other executors then the main one, then you need to press the  (it's called the Eye) key followed by one of the keys associated with the executor you want to look at.
This opens the Cue view for that executor on Screen 1. If you have a Cue view on a different screen than screen 1, then this will also show you this cue list. You can keep this Cue view locked to this executor if you press the pin icon  in the upper right corner of the Cue view. The icon gets a brighter background color. This shows you that this view is pinned.
Time view
When we stored our cues, then we get a default cue timing. This default can be changed. Press the Time key. Now you got a view like this:
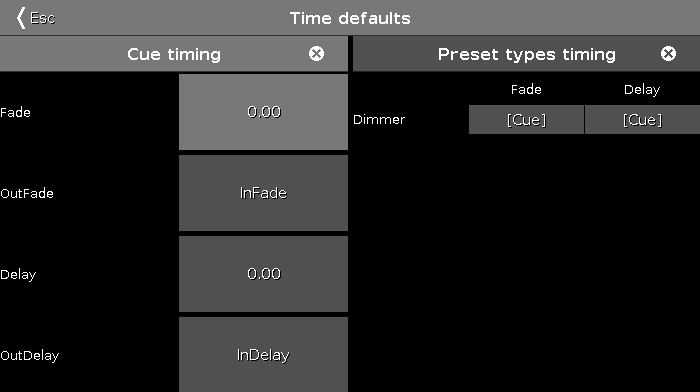
Here we can set a new default time that will be used when we store cue in the future. When we add fixtures with more preset types then these will appear on the right side of this view.
If you change any of the factory default, then your time key will flash when we are in the "storing" mode. The small icon with a circle with a cross in it  , will reset the timings to the factory defaults.
Before moving on make sure all executors are off and the faders are down.
Moving Executors to a different page
You can move your executors to a different page of executors. Yes that's right, there are several pages of executors. Press Move and then one of the keys associated with executor number 1. Now press Page+, this takes us to the next page. Notice that all our cue lists disappeared. Now press one of the keys associated with executor number 1 again. Now we have moved the cue list that was on executor 1 on page 1 to executor 1 on page 2. Also move the cue list on executor 2 to page 2.
Try to run the cue on executor 1 on page 2 and then change the page. Notice how there's now a pattern on top of the executor and there's a text telling you "+1 fixed from Page 2". This is because all the running executors should as a default always be visible. So an active executor gets "fixed" when you change the page. Try to pull the fader down. Now the executor disappeared - it went back to it's own page.
You can choose to keep an executor fixed even when it's off. What have happened so far is what's called "Auto Fix". This means that when you turn off an executor that comes from a different page, then it goes back to that page. If you want to keep it, then you can press Fix and then the executor you want to keep Fixed. Try it. To "unfix" an executor again then you press Fix and then the fixed executor.
This Auto Fix option can be turned off globally. Press Setup followed by Global Settings. This menu allows you to enable or disable the Auto Fix function. If it's disabled, then you'll need to manually Fix the executors you want to keep visible. Remember that if this is disabled then you could have an executor on a page somewhere that is giving values to your lights.
Please go to the next chapter without any fixed executors but the Global Auto Fix function enabled.
Moving the Main Executor
You can even move the Main Executor.
Doing so moves it with all the settings it might have - there are small differences in the settings between a cue list stored on the main executor and a cue list stored on one of the regular executors.
In the next chapter we are going to make more cues on the main executor.